Microsoft Access VBA Tutorials for self-paced learning, Class Modules, SQL Techniques, and AI Integration Guides.

User-Defined Data Type-3

Introduction.

Last week, we learned how to define a User-Defined Data Type (UDT) and how to use it in programs. If you’ve just landed on this page, it’s recommended that you first go through the earlier post “User-Defined Data Type–2” before proceeding further.

A user-defined type is declared within the [Private/Public] TypeEnd Type structure. Immediately after the Type keyword, you assign a name to the data type. The actual data-holding variables are defined as individual elements inside the structure, typically using built-in variable types such as String, Integer, Long, Double, or Variant.

In addition to built-in variable types, you can also use other user-defined types as elements. These act as child elements within a user-defined type — and that is what we explore here.

Combining Different sets of User-Defined Types.

First, we will declare several User-Defined Types (UDTs) to represent different categories of information for employee records — such as Home Address, Qualification, and Experience.

Each of these groups will be defined separately, with its own related data elements. Later, we will combine these groups, along with other individual fields, under a single UDT named Employee.

The following layout shows how these individual groups of employee information are structured separately, before being organized together under the common Employee user-defined type.


1.Qualification
Desc1
Desc2
2.Experience
Desc1
Desc2
3.Address and Date of Birth
Address1
Address2
City
State
PIN
BirthDate
4.Employee Details
Employee Name
Designation
Join Date
Monthly Performance Score(1 to 12)
Salary

Declaring the Data Types

First, let us declare the Data Types:

Option Compare Database

Public Type Qualification
    Q_Desc1 As String
    Q_Desc2 As String
End Type

Public Type Experience
     X_Desc1 As String
     X_Desc2 As String
End Type

Public Type BioData
    Address1 As String
    Address2 As String
    City As String
    State As String
    PIN As String
    BirthDate As Date
End Type

Public Type Employee
        E_Name As String * 45
        E_Desig As String * 25
        E_JoinDate As Date
        E_PerfScore(1 To 12) As Double
        E_Salary As Double
End Type

BioData Re-Defined with Qualification and Experience.

The Qualification and Experience user-defined types are now incorporated as child elements within the BioData type.

After this modification, the structure of the BioData type will look like the code shown below.

Public Type BioData Address1 As String Address2 As String City As String State As String PIN As String BirthDate As Date Q_Desc As Qualification X_Exp As Experience End Type

The Qualification user-defined type contains two elements of the String data type. Similarly, the Experience type also includes two String elements.

The BioData type consists of address details and date of birth as its own elements. In addition, the Qualification and Experience types are embedded as child elements within the BioData type.

Employee Data Type combined with modified BioData Type

We will now define the BioData data type as a child element of the Employee data type. The BioData element will contain two sub-elements: Qualification and Experience.

The Employee Data Type with BioData Type as a child element.

Public Type Employee E_Name As String * 45 E_Desig As String * 25 E_JoinDate As Date E_PerfScore(1 To 12) As Double E_Salary As Double B_BioData As BioData

End Type

Now you can see how all these elements fit together to form a complete Employee record.

The Employee data type consists of four elements:

  • E_Name – A String type, with a maximum length of 45 characters.

  • Designation – A String type, with a maximum length of 25 characters.

  • JoinDate – A Date type field to store the date of joining.

  • PerformanceScore – An array of 12 elements (numeric values) to store the employee’s monthly performance evaluation scores, recorded by the management on a scale of 10.

Note: The string length specifications (like 45 or 25) are arbitrary. You may keep them as they are or simply declare the fields as String without specifying a length.

The Qualification and Experience data types were declared first, and then inserted as child elements of the BioData data type.

The BioData data type itself was declared above the Employee type, before being inserted into it as a child element.

Caution.

Ensure that you are not placing a Type declaration within itself, as this would create a circular reference and is not allowed.

Now that we are ready to work with this complex data structure, the first question that naturally comes to mind is:

How do we reference each element to assign values to it?

Sample Test Program for Employee Data Type.

We will now write a small program to test the Employee data type and assign values to each element of this nested complex data structure.

However, it is not as complicated as it may sound. If you find it difficult to follow, try creating simpler examples on your own based on your current level of understanding.

The program code is given below.

Observe carefully how each element is referenced when assigning values to it.

Public Function EmplTypeTest() Dim Emp As Employee Emp.E_Name = "John" Emp.E_Desig = "Manager" Emp.E_JoinDate = #01/01/2018# Emp.E_PerfScore(Month(Date) - 1) = 4.5 Emp.E_Salary = 40000 'BioData Emp.B_BioData.Address1 = "115/8" Emp.B_BioData.Address2 = "Olencrest," Emp.B_BioData.City = "Columbus" Emp.B_BioData.State = "Ohio" Emp.B_BioData.PIN = "43536" Emp.B_BioData.BirthDate = #9/29/1979# 'Qualifications Emp.B_BioData.Q_Desc.Q_Desc1 = "Degree in Computer Science" Emp.B_BioData.Q_Desc.Q_Desc2 = "PG Degree in Computer Science" 'Experience Emp.B_BioData.X_Exp.X_Desc1 = "From Jan-2010 onwards Working as Project Manager, with XYZ Company." Emp.B_BioData.X_Exp.X_Desc2 = "From Mar-2005 to Dec-2009 worked as Team Leader with ABC Enterprise."

Call ListEmp(Emp) End Function

As you can see in the code above, each element is referenced using its fully qualified name, clearly indicating its hierarchical position within the Employee data structure.

The same code is shown again below, but this time using full object references enclosed within With ... End With statements, where the XXXX part represents the hierarchical object names.

Public Function EmplTypeTest0()
Dim Emp As Employee

With Emp
  .E_Name = "John"
  .E_Desig = "Manager"
  .E_JoinDate = #01/01/2018#
  .E_PerfScore(Month(Date) - 1) = 4.5
  .E_Salary = 40000
End With

        'BioData
With Emp.B_BioData
        .Address1 = "115/8"
        .Address2 = "Olencrest,"
        .City = "Columbus"
        .State = "Ohio"
        .PIN = "43536"
        .BirthDate = #9/29/1979#
End With

       'Qualifications
With Emp.B_BioData.Q_Desc
            .Q_Desc1 = "Degree in Computer Science"
            .Q_Desc2 = "PG Degree in Computer Science"
End With

        'Experience
With Emp.B_BioData.X_Exp
            .X_Desc1 = "From Jan-2010 onwards Working as Project Manager, with XYZ Company."
            .X_Desc2 = "From Mar-2005 to Dec-2009 worked as Team Leader with ABC Enterprise."
End With

    Call ListEmp(Emp)

End Function

Referencing individual Element Variables of Employee Data Type.

Check how the With... End With statements are structured, and how the object references are given in the correct hierarchical order to reach each element variable.

In the revised version of the code shown below, the With... End With blocks are nested, and each block uses only the nearest parent object name to access its data elements.

Public Function EmplTypeTestA() Dim Emp As Employee With Emp .E_Name = "John" .E_Desig = "Manager" .E_JoinDate = #01/01/2018# .E_PerfScore(Month(Date) - 1) = 4.5 .E_Salary = 40000 'B_BioData With Emp.B_BioData .Address1 = "115/8" .Address2 = "Olencrest," .City = "Columbus" .State = "Ohio" .PIN = "43536" .BirthDate = #9/29/1979# 'Qualifications With .Q_Desc .Q_Desc1 = "Degree in Computer Science" .Q_Desc2 = "PG Degree in Computer Science" End With 'Experience With .X_Exp .X_Desc1 = "From Jan-2010 onwards Working as Project Manager, with XYZ Company." .X_Desc2 = "From Mar-2005 to Dec-2009 worked as Team Leader with ABC Enterprise." End With

End With ‘ Emp.B_BioData End With ‘ Emp Call ListEmp(Emp) End Function

You can use any one of the three programs shown above—or run all of them one by one—before executing the following printing program, which will display the data in the Debug Window.

Public Function ListEmp(ByRef EmpList As Employee)
With EmpList
    Debug.Print "Name: ", , .E_Name
    Debug.Print "Designation: ", , .E_Desig
    Debug.Print "Join Date: ", , .E_JoinDate
    Debug.Print "Performance Score July: ", .E_PerfScore(8)
    Debug.Print "Salary: ", , .E_Salary
    
    Debug.Print "Address1: ", , .B_BioData.Address1
    Debug.Print "Address2: ", , .B_BioData.Address2
    Debug.Print "City: ", , .B_BioData.City
    Debug.Print "State: ", , .B_BioData.State
    Debug.Print "PIN: ", , .B_BioData.PIN
    
    Debug.Print "Qualification1: ", .B_BioData.Q_Desc.Q_Desc1
    Debug.Print "Qualification2: ", .B_BioData.Q_Desc.Q_Desc2
    
    Debug.Print "Experience1: ", , .B_BioData.X_Exp.X_Desc1
    Debug.Print "Experience2: ", , .B_BioData.X_Exp.X_Desc2
    
End With

End Function

Sample Output on Debug Window.

Sample Output displayed on the Debug Window is given below:

Name:                       John                                         
Designation:                Manager                  
Join Date:                  01-01-2018 
Performance Score August:    4.5 
Salary:                      40000
Address1:                   115/8
Address2:                   Olencrest,
City:                       Columbus
State:                      Ohio
PIN:                        43536
Qualification1:             Degree in Computer Science
Qualification2:             PG Degree in Computer Science
Experience1:                From Jan-2010 onwards Working as Project Manager, with XYZ Company.
Experience2:                From Mar-2005 to Dec-2009 worked as Team Leader with ABC Enterprise.

Input Values through the Keyboard.

If you would like to try out an array example, then copy-paste the following two programs into a Standard Module and run the first code. 

Public Function EmplTypeTestB()
Dim Emp(1 To 3) As Employee
Dim j As Integer, strlabel As String

For j = 1 To 3

With Emp(j)
strlabel = "( " & j & " )"
    .E_Name = InputBox(strlabel & "Name:")
    .E_Desig = InputBox(strlabel & "Designation:")
    .E_JoinDate = InputBox(strlabel & "Join Date:")
    .E_PerfScore(Month(Date) - 1) = InputBox(strlabel & "Performance Score:")
    .E_Salary = InputBox(strlabel & "Salary:")
    
   'B_BioData
    With Emp(j).B_BioData
        .Address1 = InputBox(strlabel & "Address1:")
        .Address2 = InputBox(strlabel & "Address2:")
        .City = InputBox(strlabel & "City:")
        .State = InputBox(strlabel & "State:")
        .PIN = InputBox(strlabel & "PIN:")
        .BirthDate = InputBox(strlabel & "Birth Date:")
       
       'Qualifications
        With .Q_Desc
            .Q_Desc1 = InputBox(strlabel & "Qualification-1:")
            .Q_Desc2 = InputBox(strlabel & "Qualification-2:")
        End With
    
        'Experience
        With .X_Exp
            .X_Desc1 = InputBox(strlabel & "Experience-1:")
            .X_Desc2 = InputBox(strlabel & "Experience-2:")
        End With
    End With
End With
Next

    
    Call ListEmp2(Emp)

End Function

The InputBox() function allows you to enter the details of three employees directly from the keyboard, based on the prompts displayed for specific values. In the final statement, Call ListEmp2(Emp) runs the following code using the employee records array and prints the output in the Debug Window. Make sure the Debug Window is open (Ctrl+G).

Public Function typeTest()
Dim mySales As Sales

   mySales.Desc = "iPhone 8 Plus"
   mySales.Quantity = 1
   mySales.UnitPrice = 75000#
   mySales.TotalPrice = mySales.Quantity * mySales.UnitPrice

Debug.Print mySales.Desc, mySales.Quantity, mySales.UnitPrice, mySales.TotalPrice

End Function
 

Printing Program.

Public Function ListEmp2(ByRef EmpList() As Employee)
Dim j As Integer, strlabel As String
Dim lower As Integer
Dim upper As Integer

lower = LBound(EmpList)
upper = UBound(EmpList)

For j = lower To upper
With EmpList(j)
Debug.Print
    Debug.Print "=== Employee: " & .E_Name & "  Listing ==="
    Debug.Print "Name: ", , .E_Name
    Debug.Print "Designation: ", , .E_Desig
    Debug.Print "Join Date: ", , .E_JoinDate
    Debug.Print "Performance Score " & MonthName(Month(Date) - 1) & ": ", .E_PerfScore(8)
    Debug.Print "Salary: ", , .E_Salary
    
    Debug.Print "Address1: ", , .B_BioData.Address1
    Debug.Print "Address2: ", , .B_BioData.Address2
    Debug.Print "City: ", , .B_BioData.City
    Debug.Print "State: ", , .B_BioData.State
    Debug.Print "PIN: ", , .B_BioData.PIN
    
    Debug.Print "Qualification1: ", .B_BioData.Q_Desc.Q_Desc1
    Debug.Print "Qualification2: ", .B_BioData.Q_Desc.Q_Desc2
    
    Debug.Print "Experience1: ", , .B_BioData.X_Exp.X_Desc1
    Debug.Print "Experience2: ", , .B_BioData.X_Exp.X_Desc2
    
End With

Next
End Function

I hope you will experiment with User-Defined Types (UDTs) in your projects and explore their strengths and limitations.

The main drawback of UDTs is the lack of a built-in mechanism to validate the data assigned to their elements. For example, if a future date is entered into the Date of Birth element, there is no built-in validation to alert the user that the value is invalid. Similarly, if a negative value is entered into a Salary field, it will be accepted without any error. Wherever data validation is required, you must write separate validation code each time you use a UDT.

A better approach is to use Class Modules. In a Class Module, you can define each data element as a property and include validation logic within its Set property procedures to ensure data integrity before accepting the values. You can also create Functions or Subroutines within the Class Object to handle common operations on the data, and simply call them from your programs. All of this logic remains encapsulated within the Class Module itself, so you don’t need to rewrite it separately every time.

In the next section, we will learn how to use Class Modules to define structured data and use them effectively in programs.

Share:

User Defined Data Type-2

Introduction.

This is the second post on User-Defined Data Types (UDTs).

You can find the link to the first post on this topic [here].

The need for User-Defined Data Types arose when we used two-dimensional arrays of the Variant data type to store different kinds of values (such as String, Integer, and Double) in each element of the array. The Variant data type can automatically adjust its type depending on the value assigned to it.

Instead of using a single Variant variable with a multi-dimensional array, we could also use several separate single-dimensional variables of different data types as an alternative. For most simple data-processing tasks, these approaches are more than sufficient.

However, learning new techniques is always exciting in programming.

The User-Defined Data Type is one such interesting feature in VBA, and in this post, we will explore how to create and use it in our programs.

How to Define a User-Defined Data Type

The steps go something like this:

  1. @@@You can define a new data type that combines multiple built-in variable types—such as Integer, Long, Double, and String—into a single structure. This User-Defined Data Type (UDT) must be declared within a Type ... End Type block at the module level, typically at the beginning of a Standard Module, before any procedures.

  2. The following example defines a UDT named myRecord with two elements: RecordID (of type Long) and Description (of type String):

    Public Type myRecord
    
    RecID as Long
    Description as String
    
    End Type
    

    By default, a User-Defined Type (UDT) has Public scope, though explicitly declaring it as Public or Private is optional. If declared as Private, the UDT is accessible only within the same module where it is defined. In that case, variables such as Dim AbcRec As myRecord can be declared and used only inside that module.

    When declared with the default Public scope, the UDT becomes available to all modules within the current project, and even to other projects that reference this database.

    Let’s begin with a simple example:

    Type Sales
        Desc As String
        Quantity As Long
        UnitPrice As Double
        TotalPrice As Double
    End Type
    

    The dataType name is Sales.

    As you can see in the Sales data type, we have used built-in data Types String, Long Integer, and Double for different data elements.

    Using the User-Defined variable in the program starts with dimensioning a Variable of Type Sales, like any other variable.   

    Public Function typeTest()
    Dim mySales As Sales
    
       mySales.Desc = "iPhone 8 Plus"
       mySales.Quantity = 1
       mySales.UnitPrice = 75000#
       mySales.TotalPrice = mySales.Quantity * mySales.UnitPrice
    
    Debug.Print mySales.Desc, mySales.Quantity, mySales.UnitPrice, mySales.TotalPrice
    
    End Function
     

    Result printed in the Debug Window:

    iPhone 8 Plus  1             75000         75000 
    

    Unlike built-in variables, the elements of a User-Defined Type are always accessed by specifying the Type name, followed by a dot, and then the element name (for example: mySales.Desc). In this way, the Desc, Quantity, UnitPrice, and TotalPrice elements are treated as individual properties of mySales.

    To make the code cleaner and more flexible, we can place these element references inside a With… End with structure. This allows us to enter data directly from the keyboard into each element of the Sales record using the InputBox() function.


Public Function typeTest()
Dim mySales As Sales

With mySales
   .Desc = InputBox("Item Description: ")
   .Quantity = InputBox("Item Quantity: ")
   .UnitPrice = InputBox("Item Unit Price: ")
   .TotalPrice = .Quantity * .UnitPrice
End With

'Print the values on Debug Window
With mySales
  Debug.Print .Desc, .Quantity, .UnitPrice, .TotalPrice
End With
End Function

The modified code will get information from one Record and print it out on the Debug Window.  Before running the Code, open the Debug Window (Ctrl+G) to view the output.

Arrays of User-Defined Type

Next, we will define an array of mySales variables to store information for five different items. We will then pass this array of user-defined variables—each containing multiple data elements—to the SalesPrint() function as a parameter. The SalesPrint() function will calculate and update the TotalPrice element for each item before printing the array values in the Debug Window.
(Keep the Debug Window open while running the program.)

The sample VBA code for this program is given below:

Public Function SalesRecord()
Dim mySales(5) As Sales
Dim j As Integer, strLabel As String

For j = 0 To UBound(mySales) - 1
    strLabel = "(" & j + 1 & ") "
    With mySales(j)
       .Desc = InputBox(strLabel & "Item Description:")
       .Quantity = InputBox(strLabel & "Quantity:")
       .UnitPrice = InputBox(strLabel & "UnitPrice:")
       .TotalPrice = 0
    End With
Next

Call SalesPrint(mySales())

End Function

Check the Dim statement—it works like any other array definition. We also declare two additional variables: j and strLabel. The variable j serves as the control variable in the For…Next loop, while strLabel is used to construct and store a label such as (1), (2), etc., which appears in the InputBox() prompt. This label helps identify the current record number as we enter data into each record.

We have chosen meaningful names for the array elements—Desc, Quantity, and UnitPrice—instead of using array index numbers like Sales(0,0) for Description or Sales(0,1) for Quantity. The 'MySales(j).TotalPrice' element is initially assigned 0; its value will be calculated and updated in the SalesPrint() function. The array is passed to SalesPrint() as a ByRef parameter.

The SalesPrint() Function.

The SalesPrint() function Code is given below:

Public Function SalesPrint(ByRef PSales() As Sales) Dim j As Integer, strLabel As String Debug.Print "Description", " ", "Quantity", "UnitPrice", "Total Price" For j = 0 To UBound(PSales) - 1 strLabel = "(" & j + 1 & ") " With PSales(j)

'calculate TotalPrice

.TotalPrice = .Quantity * .UnitPrice 'print the values in debug window Debug.Print strLabel & .Desc, " ", .Quantity, .UnitPrice, .TotalPrice End With Next End Function

The SalesPrint() function receives the Sales Record array by reference through the PSales variable. Within the function, two local variables are defined: j as an Integer and strLabel as a String. The function begins by printing a header line in the Debug Window, setting up proper column headings for displaying the sales record details.

When printing the data, commas are used to separate each item, placing them in 14-column zones on the same line. To allow the Item Description to occupy more space, an empty string is inserted as the second item on the print line. This effectively moves the Quantity value to the 28th column while keeping the layout neat and aligned.


Next, the For... next loop is used to access each record in memory, with the control variable j serving as the array index. The loop runs from 0 to 4, processing all five records.

The first line inside the loop constructs a label in the format (1), (2), and so on, to indicate the sequence of records as they were entered using the InputBox() function.

The next statement uses a With... End with structure on the PSales(j) record. This allows direct access to its elements (Desc, Quantity, etc.) without repeatedly referencing the top-level array name.

Within the With block, the TotalPrice element is calculated and assigned its value. The following line then prints the current record to the Debug Window. This process repeats for each record, ultimately displaying all items in the array.

By now, you should have a good understanding of the usefulness of User-Defined Types. With a little further exploration, you can even save these records from memory into an Access table.

Keep in mind that a User-Defined Type is usually designed for a specific task, and its structure may not be suitable for general-purpose use like built-in variables. For example, elements such as Desc, Quantity, UnitPrice, and so on, may not be relevant outside the context for which the type was created.

There are, however, many interesting ways to leverage User-Defined Types, and we will continue this discussion in next week’s post.

Share:

Passing Two Dimensional Array to Function

Introduction.

First of all, I have some good news for you, our website: LEARN MS-ACCESS TIPS AND TRICKS, has been selected by the https://blog.feedspot.com panelist as one of the Top 5 Microsoft Access Blogs on the Web and awarded the Badge given below.

Microsoft Access Blogs

You can find some of the top-ranked Blogs on a variety of subjects, RSS Feeds, YouTube Channels,  top News Websites, and others.  Subscribe to Blogs/News Feeds, or topics of any other area of interest, and get regular updates from www.blog.feedspot.com to your Inbox, as and when they happen, by providing your email address.

Returning to our VBA lessons, last week we briefly discussed passing arrays as parameters to a Function using the ByRef method. This allowed us to work directly with the original array inside the called function and sort its values in descending order.

In our example, we used an array containing values for only five elements, but in practice, an array can hold many rows and columns of data.

The Re-Dimension (ReDim) Statement.

An array can be re-dimensioned multiple times during program execution to increase or decrease the number of rows if its size cannot be determined in advance. In such cases, you should omit the element count in the initial Dim statement.

Example:

'Cannot Re-dimension pre-defined Arrays
.
Dim Products(1 to 5) as String
.
or
.
Dim Products(5) as String'The number of elements are predefined

'Re-dimension this Array later for required  
'Number of elements, not known in advance. 
.
Dim Products() as String
.
'Re-Dimension the Array for required number of elements
'Remember the array index numbers will be 0 to 4, total 5 elements
ReDim Products(5) As String
'
'OR
'In this case Array Index Number Range 1 to 5
ReDim Product(1 to 5) As String

'later on in the program
'all the values assigned to first 5 elements will be lost.
.
ReDim Products(7) As String 
.
or
.
ReDim Products(Ubound(Products)+2) As String
.
'To preserve the values already assigned to first 5 elements
.
ReDim Preserve Products(7) As String

Note: An important point to note is that any re-dimensioning of the array should be done in the calling procedure itself—before passing it to the called function if a size change is required. Although arrays are passed by reference and the called function can work directly with the passed variable, it cannot re-dimension the array to increase or decrease its number of elements from within the called function.

Two-Dimensional Array as Function Argument.

Now that we are aware of the limitations of passing arrays to a called function, let’s try passing a two-dimensional array containing Sales data to a function and printing its values in the Debug Window. Each record in the Sales data array will contain the following values:
  1. Product Name - Text

  2. Quantity  - Integer

  3. Unit Price – Double

  4. Total Value  - Double (will be calculated in the called function)

The sales records contain fields with different data types. Normally, to pass these values individually to a called function, we would need four separate array variables with different data types — for example:

  1. String for Product Name

  2. Integer for Quantity

  3. Double for Unit Price

  4. Double for Total Price

Each field’s values would be stored in its own array variable and passed separately to the function.

However, we will do this differently. Instead of using four separate arrays, we will use a single variable: a two-dimensional array of the Variant data type, with four rows (each row representing one sales record) and four columns (each column representing a field). This way, we can pass all four fields of each record together as one variable to the called function.

The Variant Data Type.

We are not storing the column names anywhere within the array. It is simply assumed that:

  • The first column holds the Product Name

  • The second column holds the Quantity

  • The third column holds the Unit Price

  • The fourth column holds the Total Price

Since we are using a Variant data type for the array, each individual cell in the array can hold different data types. A Variant variable automatically adapts its data type to match the type of value assigned to it. This flexibility allows us to store text, integers, and floating-point numbers together in the same array.

Before writing the complete function, let’s first look at the Dim statement used to define the two-dimensional array, and how the sales values are assigned to each element of the array.

' variant Variable can hold different data types in each element 
Dim Product(4,4) as Variant 
'
Product(0, 0) = "Hard Disk": Product(0, 1) = 5: Product(0, 2) = 125.5: Product(0, 3) = 0

Product(1, 0) = "Keyboard": Product(1, 1) = 2: Product(1, 2) = 25.25: Product(1, 3) = 0

Product(2, 0) = "Mouse": Product(2, 1) = 3: Product(2, 2) = 13.75: Product(2, 3) = 0

Product(3, 0) = "DVD Writer": Product(3, 1) = 10: Product(3, 2) = 30: Product(3, 3) = 0

In the above example, we have only four records (rows) in our table, and each record contains four fields (columns). Every cell in this two-dimensional array is identified by a pair of numbers—the row index and the column index—separated by a comma. The index number on the left represents the row index, and the number on the right represents the column index. Since our array has 4 rows and 4 columns, both index ranges go from 0 to 3.

Here is how the columns are arranged:

  • Column 0: Product Name

  • Column 1: Quantity

  • Column 2: Unit Price

  • Column 3: Total Value (to be calculated and assigned later)

We can pass the entire array to a function as a ByRef parameter, allowing the function to work directly with the original data.

If you are new to two-dimensional arrays, it can feel a bit confusing at first to understand how the values are arranged and how to refer to each cell. This becomes even trickier when performing calculations across multiple cells within the same row.

Fortunately, there is a better way to handle this complexity—by using User-Defined Variables. Yes, you can actually define your own variable type, in addition to the built-in types provided by VBA.

We will explore this concept in detail next week. Once you get familiar with it, you’ll find it much easier and more intuitive than juggling rows and columns. The best part is that this method scales effortlessly—you can work with 5 rows, 500 rows, or even 5000 rows using the same statements in your function.

Create the Product List Data.

Public Function ProdList()
Dim Products(4, 4) As Variant
Dim j As Integer, k As Integer, stridx As String
' 0 = Description
' 1 = Quantity
' 2 = Unit Price
' 3 = Total Price to be calculated
'Array elements index numbers are 0 to 3
For j = 0 To 3
 For k = 0 To 3
    stridx = "(" & j & "," & k & ")"
    Select Case k
        Case 0
          Products(j, k) = InputBox("Product Name" & stridx)
        Case 1
          Products(j, k) = InputBox("Quantity" & stridx)
        Case 2
          Products(j, k) = InputBox("Unit Price" & stridx)
        Case 3
          Products(j, k) = 0 'total value will be calculated
    End Select
    Next k
Next j

Call ProdPrint(Products)

End Function

VBA Code Line by Line

We have defined the Products variable as a Variant data type with 4 rows and 4 columns, so it can hold values of different data types in each cell.

In the next line, we declare three more variables:

  • j and k as control variables for the For…Next loops

  • strIdx as a String variable for building text to display the index numbers of each cell in the InputBox() prompt.

We then set up two nested For … Next loops to control the index numbers of the rows and columns. The outer loop (j) controls the row index, while the inner loop (k) controls the column index.

Inside the inner loop, we use a Select Case…End Select structure to determine which field is being processed based on the current value of k:

  • When k = 0, the InputBox() function prompts for the Product Name and assigns it to Products(j, 0).

  • When k = 1, it prompts for the Quantity and assigns the value to Products(j, 1).

  • When k = 2, it prompts for the Unit Price and assigns it to Products(j, 2).

  • When k = 3, it initializes Products(j, 3) = 0 (this will later hold the calculated Total Price).

The outer loop repeats this process four times (for j = 0 to 3), and for each row, the inner loop runs four times (for k = 0 to 3), collecting values from the user for each cell in the current row.

The Output Function ProdPrint().

When the control exits the loop, the ProductPrint() function is called, passing the Products variable as a parameter.

Public Function ProdPrint(List As Variant)
Dim j As Integer, k As Integer

'Ubound() function will get the
'total rows in the array - first value in the Dim statement
For j = 0 To UBound(List, 1) - 1
      List(j, 3) = List(j, 1) * List(j, 2)
    For k = 0 To UBound(List, 2) - 1 'get second value in Dim statement
        Debug.Print List(j, k),
    Next k: Debug.Print
Next j

End Function

The ProductPrint() function receives the memory reference (address) of the Products array through the ByRef method.  If the ByVal or ByRef keyword is not specified explicitly before the parameter variable, it assumes ByRef as the default. 

As in the earlier program, two integer variables, j and k, are declared as control variables for the outer and inner For…Next loops. These loops are required to navigate the array using its row and column index numbers. The loop starts at 0, and to determine the end value dynamically, we use the Ubound() (Upper Boundary) function on the array dimension. In the previous example, we directly used the values 0 to 3, but here we use Ubound() to make the program flexible. This ensures that if the array size changes later through ReDim statements, the loop still calculates the correct number of rows and columns automatically.

Usage UBound() Function to get Two-Dimensional Index Numbers.

UBound(Array,1)

The Ubound(List, 1) function returns the number of rows in the array, which is 4. However, array row indexes start from 0 in memory, so the valid index numbers are 0 to 3. The second argument (1) in the Ubound() function specifies that we want the upper bound of the first dimension (rows) of the array. Because the row index starts at 0, we subtract 1 from the total number of rows (4 − 1) when using these indexes in a For…Next loop.

UBound(Array,2)

The UBound(List, 2) function returns the number of columns in the array. The second parameter is optional—if omitted, UBound will return only the upper bound of the first dimension (rows). For single-dimensional arrays, this second parameter is never used.

The statement immediately following the first For…Next loop — List(j, 3) = List(j, 1) * List(j, 2) — calculates the total price of each item and stores it in the rightmost cell. These updated values are then printed in the Debug window during the next For…Next loop, which outputs the complete sales record for each item.

Controlling the Print-Head

Placing a comma at the end of a 'Debug.Print' statement aligns the next item in the 14th column on the same line, following the previously printed item.

An empty 'Debug.Print' statement, placed immediately after the inner Next statement (without a trailing comma), moves the print cursor back to the first column of the next line. This ensures the output for the next sales record begins at the correct position.

If a semicolon (;) is placed at the end of a 'Debug.Print' statement, the print cursor advances to the very next character position, without leaving any space between the printed items.

Next week, we will explore user-defined variables that can hold mixed data types. With them, we can assign meaningful names to each element of a collection instead of relying on array positions as we did in the examples above. This will make it much easier—and more intuitive—than trying to memorize each array element’s logical meaning based solely on its index.


Share:

Function Parameter Array Passing

Introduction

    Last week, we explored the use of ByVal (By Value) and ByRef (By Reference) in function parameters. These keywords determine how data is passed from the calling function to the called function—either as the value stored in a variable (ByVal) or as the memory address (reference) of the variable (ByRef). If you have not yet read that article, you can find the link below:

  • Function Parameter ByVal and ByRef usage.

Now, we will learn:

  1. How to pass the location address of a single element of an Array to the called Function and change its value?

  2. How to pass the Location Address of an array and sort the values in the array in Descending Order.

Two Test Programs.

Function ArrayArg_Test1().

First, let us write two small programs for the first example. The first Program Code is given below.

Public Function ArrayArg_Test1()
Dim NumArray(1 To 5) As Integer, j As Integer

'load array with numbers 1 to 5
For j = 1 To 5
   NumArray(j) = j
Next

'pass a single element value
Call ArrayArg_Test2(NumArray(4))

'Print the Array values after change
For j = 1 To 5
  Debug.Print j, NumArray(j)
Next

End Function

'Result:
1
2
3
20
5

In the first line of code, we define an array variable (NumArray()) with five elements to store integer values. We also declare a control variable j for use in the For…Next loop.

Inside the For…Next loop, the array is populated with values from 1 to 5 — for example, NumArray(1) = 1, NumArray(2) = 2, and so on, up to the fifth element.

Next, we call the ArrayArg_Test2() function, passing NumArray(4) as a parameter. The number 4 inside the brackets refers to the index position of the element being passed—not its value. In this case, the element at index 4 happens to hold the value 4. The ArrayArg_Test2() function receives this argument either as the value itself or as a reference to its memory location, depending on how the function’s parameter is defined.

If the parameter is defined with ByVal, the value of the element is copied into a local variable within the function, leaving the original array element unchanged. If the parameter is defined with ByRef, the function works directly on the original element, without creating a copy. If neither ByVal nor ByRef is explicitly specified, ByRef is used by default. In our example, we will use this default behavior and omit the ByRef keyword in the function’s parameter definition.

In the next For … Next loop, the contents of the array are printed in the Debug window. If the ArrayArg_Test2() function has made any changes to the Array, those changes will be reflected in this printed list. Since we already know that the array elements 1 to 5 initially contain the values 1, 2, 3, 4, and 5, we did not print them before calling the second function.

Function ArrayArg_Test2().

The ArrayArg_Test2() Function VBA Code is given below:

Public Function ArrayArg_Test2(NA As Integer) 'The word ByRef is omited
'multiply NumArray(4) value * 5 = 20
    NA = NA * 5
End Function

The Variable NA is assigned to the NumArray’s 4th element location address.  The ArrayArg_Test2() picks the value from NumArray(4) itself, multiplies it by 5, and stores the result back in the same location.

This was working with a single element of an Array.  What about passing the full Array’s location address and working with hundreds of elements of this array in the called Function? 

Get the Array Sorted and Print.

We will now pass the same array used in the previous example as a parameter to a sorting function, which will arrange its values in descending order.

The modified version of the First Function Code is given below. 

Public Function ArrayArg_Test3()
Dim NumArray(1 To 5) As Integer, j As Integer

For j = 1 To 5
   NumArray(j) = j
Next

'Pass the array to the called function
Call ArrayArg_Test4(NumArray())

'Print the Sorted Array
For j = 1 To 5
  Debug.Print j, NumArray(j)
Next

End Function

Check the function call statement. NumArray() is passed without the element number, as we did in the earlier example. The opening and closing brackets are required along with the array variable name to indicate that the parameter passed is an array, not a single variable.

When control is returned from the ArrayArg_Test4() function, the sorted list of numbers is printed in the debug window. The value printed on the left side is the array element number, and the right-side value is the array value itself,  sorted in descending order.

Sort the Array in Descending (Z-A) Order.

The Data Sorting Program is given below:

Public Function ArrayArg_Test4(apple() As Integer)
Dim j As Integer, k As Integer, Temp As Integer

'Bubble Sort the Array in Descending order
' 1st loop runs maximum array elements minus 1 times

For j = 1 To 5 - 1 ' in place of 5-1 you may use Ubound(apple)-1

   ' inner loop starts with outer loop's current value + 1
   ' and runs to the maximum number of array elements times

      For k = j + 1 To 5 ' replace 5 with Ubound(apple)

     If apple(k) > apple(j) Then 'if second value is greater
     
        Temp = apple(j) 'copy 1st value to Temp Variable
        
        apple(j) = apple(k) 'move greater value up
        
        apple(k) = Temp ' move the smaller value down
        
     End If
    Next k ' compare next two elements
Next j
End Function

To sort the values in ascending order, the only change needed in the program is to replace the greater-than (>) comparison operator with the less-than (<) operator. In our example, the numbers were already loaded into the array in ascending order.

To make the program work with arrays of any size, replace the fixed constant 5 - 1 in the first For… Next loop with UBound(apple) - 1, and replace 5 in the second loop with UBound(apple). This way, the program can handle arrays with any number of elements without requiring further changes.

Also, note that we omitted the ByRef keyword in the parameter definition of the called ArrayArg_Test4() function. Since ByRef is the default in VBA, the parameter is automatically treated as a ByRef variable.

Share:

Function Parameter ByVal and ByRef Usage

Introduction.

Before taking up the above subject, let us look at some fundamentals of the variables for the benefit of novices.

When we define a variable in VBA or in any other programming language, the computer reserves some memory location and allocates some memory cells (the number of cells allocated depends on the declared variable type, like Integer, Double, String, etc.) to store values passed to it. 

In layman's analogy, we can imagine a variable as a box with the name 'Apple' or whatever name we give to the box and uses that name to pick the value stored in it.  Assume that you have put 5 in the Apple box.  We can give these apples to someone in two ways.

  1. Make copies of the apples (the number) from the box ourselves and put them into another box and pass it.  The target box's name will be different.  The recipient of the new box can work with his copy of the apples, like adding more apples in his box or removing some of them, etc.  There will not be any change in the first box's contents. 
  2. We can tell the other person (or Function), which area of the room (location) you have kept the original box of apples, get the box contents from there, and work with it.  In this room (or within the function body) there may be other boxes (Variables) with different names and contents.

Making Copies of Original Values.

In the first method explained above, unlike the physical box, you can make copies of the original value and store them in different Variables.  The original value will not change in the first Variable.  The Function that gets the new Variable with the copy has no access to the first Variable.  He can do whatever he wants to do with the copy he has.

In the second case you can tell the location of the Apple_Box1 to the other Function so that it can go there and find its contents and do whatever the Function wants to do with them (add, subtract, multiply, etc., or use it as part of other calculations) or whatever operations you would like to do with them. 

To prove the first point above, let us take a closer look at the next two example functions Test_1A() (the calling function) and Test_1B() (the called function with the copy of the value).

Method-1 Examples:

Public Function Test_1A()

'Define two variables(boxes)to hold values of
'Long Integer type
Dim Apple_Box1 As Long, ApplesReceived As Long

'Put an initial value of 10

'into the variable

Apple_Box1 = 10

'sending a copy of Apple_Box1 Value to Apple_Box2

'Whatever value changes happened in Apple_Box2 in Test_1B()
'Received back into the third box:ApplesReceived

ApplesReceived = Test_1B(Apple_Box1)

'call funcction Test_1B() with the value
'Display the result in MsgBox.
MsgBox "Apple_Box1: " & Apple_Box1 & vbLf & "Apple_Box2 contents: " & ApplesReceived

End Function

In the above program, we are defining two Variables Apple_Box1 and ApplesReceived both to store Long Integer type values. Here, we are not going to bother about what is Long Integer or Short Integer and the range of values that we can store in them, etc.

Next line Apple_Box1 = 10, the value 10 is stored in Apple_Box1. 

The next three lines are remarks explaining what we are doing in the next line. 

We are calling Test_1B() Function and passing the value of Apple_Box1 to the function to do something with the value received in a Variable (ByVal Apple_Box2).  The ByVal before Apple_Box2 given in Test_1B() function states that take a copy of the value from Apple_Box1.  The ‘As Long’ appearing after the closing parenthesis indicates that the second function does some calculations with the received value and returns the result to the first function.  The new value received is stored in ApplesReceived Variable. 

Next line MsgBox() function displays the Apple_Box1 contents and the result value (after modification done to the original copy of the value) received from Test_1B() function.

The Test_1B Function.

Public Function Test_1B(ByVal Apple_Box2 As Long) As Long

'Take Note of the Key-Word 'ByVal' (says take a Copy of the Passed Value)
'Return the value back into the first function Test_1A
'After adding 15 to the original value of 10
'copied into Apple_Box2

Test_1B = Apple_Box2 + 15

End Function

There is only one executable statement in the above function.  Immediately after the function definition, four lines of remarks indicate what happens in the function.

We will take a closer look at the next line of the statement. This statement has two parts – the first part appears left of the = sign and the second part is on the right side of the equal sign. 

In this expression, the left side of the equal sign will be a Variable or a Function name.  By now you will be asking yourself why a function name is there. That will be explained in a moment.

The computer always evaluates the expression given on the right side of the equal sign first and arrives at a single value and moves that result in the Variable given on the left side of the equal sign.  Any existing value in the variable will be lost. You can write that expression in two lines to arrive at the same result as below:


Apple_Box2 = Apple_Box2 + 15

Test_1B = Apple_Box2

In the first expression, you can see that we have used the Apple_Box2 variable on the left side and right side of the = sign. As I said earlier the expression on the right side of the equal sign is evaluated first. So it takes the existing value of 10 from Apple_Box2 for calculations and Adds 15, arriving at the single result value of 25, and moves that value into Variable Apple_Box2, replacing the earlier value of 10.

If the Function name (the function name given in the first line of Code) appears on the left side of the equal sign, then the meaning of the statement is that the final result of the expression must be returned to the Calling Function.  Here, the Function Name acts as a Variable with the Data Type (As Long) specified immediately after the closing brackets on the first line.

This function name appears on the calling statement in the calling function to the right side of the = sign and a Variable Name on the left side of the = sign that saves the received result value (ApplesReceived = Test_1B(Apple_Box1).

Method-2 Examples:

In this method, we have defined only one variable Apple_Box1 as a Long Integer Type.  In the next line, the Variable is loaded with an initial value of 10.  The next two lines are remarks explaining what is happening in the next line that calls the second function Test_1D().

Compare this statement with the statement that calls Test_1B.  Unlike the statement that calls Test_1B() the Function Name Test_1D and the function parameter, Variable Apple_Box1 only appear here.  The opening and closing brackets are omitted from the function name. The parameter variable is the second item.  Test_1D() function is not returning any value back into the calling function Test_1C.  Therefore, we don't need to write this line of code in the form of an expression as we did in Test_1A Function.  But, you cannot write the statement as:

Test_1D(Apple_Box1).,

Once we use the parenthesis (normally used with the function name) around the parameter variable, then VBA assumes that some value is returned from the called function and you are forced to write it like we did it in Function Test_1A:

x = Test_1D(Apple_Box1) 'Expression
'OR use Call statement 
Call Test_1D(Apple_Box1)

There will not be any value in the variable x because no value is returned from the called function.

If you feel comfortable with this method, then you may do so. You will be defining one more variable for this purpose and your program takes up more memory.

The usage of the Call statement requires the parenthesis around the parameter variable. If no parameters to pass to the called function even then you should use the opening and closing parenthesis at the end of Function Name like Call Test_1D().

When control returns from Test_1D() the next line displays the changed value in Apple_Box1 Variable.

Public Function Test_1C()
Dim Apple_Box1 As Long

'put 10 into Variable
Apple_Box1 = 10

'here Test_1D function takes the
'location address of Apple_Box1

Test_1D Apple_Box1 'compare this statement with Test_1A function

MsgBox "Apple_Box1: " & Apple_Box1 & vbLf & "Apple_Box2 contents: " & ApplesReceived

End Function

Test_1D() function takes the location address of the parameter variable passed to it. It works directly with the value stored in the variable Apple_Box1's own location.

Public Function Test_1D(ByRef Apple_Box2 As Long)

Apple_Box2 = Apple_Box2 + 15

End Function

 Test_1D() takes the location address (this is the memory location, number of the variable) of variable Apple_Box1 into variable Apple_Box2, defined in the parameter area of Test_1D() function.

Now, look at the expression:

Apple_Box2 = Apple_Box2 + 15

Apple_Box2 contains the location address, not the contents of the Apple_Box1 variable. But, no need to make any change in the expression to do any kind of calculations.  The computer uses the location address to pick the value from there and use the value in calculations.

Even though we have used ByRef to the Parameter Variable, to accept the location address of the variable passed to it (always a number irrespective of different variable types), the rest of the parameter definition is like any other variable with variable Type (as Long) specification.  Compare Test_1D() function definition with the Test_1B().  Test_1D doesn't have the As Long at the end of the line because it is not returning any value from the function but it changes the original value at its location directly. 

You may omit the usage ByRef from the Function declaration. By default, VBA assumes that the Function Parameter declaration is ByRef (By Reference) if you have not explicitly defined the parameter as ByVal like:

Public Function Test_1D(Apple_Box2 As Long)

Each Variable Type, like Byte, Integer, Long (integer), Double, String, etc., gets allocated with enough memory cells, besides its own address, to hold their maximum range of values. This is different between Programming Languages: VBA, C, C++, C#, etc.

In Conclusion.

We don't have to bother about going too deep into all those things, but it does no harm to have a basic understanding of them.

If you get in touch with the C language and its variants, like the examples given above, you need to deal with these things, sooner or later.

Our discussion here was on a single variable and its value. How we can work with an Array of Variables and Values. We will explore its methods in the coming weeks.


Share:

DIRectory and File Copy Utility

Introduction.

Last week, we explored how to use the Dir() DOS command to read files from the disk one by one and display their names in the Debug window.

Building on that, we will now create a VBA utility that uses the Dir() command together with the very useful FileCopy statement (note that it is a statement, not a function) to read and transfer files from one folder to another location on the disk. The files can be of any type—for example, *.pdf, *.docx, *.xls, or *.* (all files).

This utility will read the files from a folder specified in a text box, list them in a list box using the Dir() command, and allow you to copy either all the listed files or only the selected ones to a target folder specified in another text box.

The Utility Form.

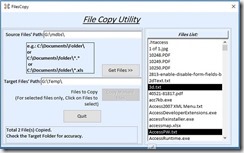
The design view image of a Form created for this purpose is given below for reference:

The form design is simple, consisting of two text boxes, one list box, three command buttons, and a label control to display messages from the utility program. You can download this utility form as part of a sample database at the end of this article.

These are the names of the Controls on the Form:

  1. Top Text box: Source

  2. Text Box 2:  Target

  3. List Box:  List1

  4. Top Command Button: cmdDir

  5. Second Command Button: cmdSelected

  6. Last Command Button: cmdClose

  7. Bottom empty Label Name: msg

Note: If you are designing this form yourself, make sure that the same control names are used as described above. The VBA code you will copy into the module references these exact names.

In addition to the main controls, there is a Label control below the first (source) text box that provides examples of how to specify the source file path correctly.

Another label control at the bottom of the form displays messages during input validation and shows error notifications while the VBA code is executing.

An Image of a sample run of the FileCopy Statement is given below:

filecopy_run0

Right-click to open Large Image in New Tab/Window.

You can create this user interface using the control names provided above. Once the form is designed with the correct control names, open the VBA window for the form and copy the following code into its VBA module:

The Form Module Code.

Option Compare Database
Option Explicit
Dim strSource1 As String
Dim strSource2 As String, strMsg As String

Private Sub cmdClose_Click()
On Error GoTo cmdClose_Click_Error

If MsgBox("Close File Copy Utility?", vbOKCancel + vbQuestion, "cmdClose_Click()") = vbOK Then
   DoCmd.Close acForm, Me.Name, acSaveYes
End If

cmdClose_Click_Exit:
Exit Sub

cmdClose_Click_Error:
MsgBox Err.Description, , "cmdClose_Click()"
Resume cmdClose_Click_Exit
End Sub

Private Sub cmdDir_Click()
'=========================================================
'Author : a.p.r.pillai
'Date   : June 2018
'Purpose: Take directory listing
'Rights : All Rights Reserved by www.msaccesstips.com
'=========================================================
Dim strSource As String, strMsg As String
Dim i As Integer, x As String
Dim j As Integer, strfile As String
Dim strList As ListBox, LList As String

On Error GoTo cmdDir_Click_Err
msg.Caption = ""

'Read Source location address
strSource = Nz(Me!Source, "")
If Len(strSource) = 0 Then
    strMsg = "Source Path is empty."
    MsgBox strMsg,vbOKOnly + vbCritical, "cmdDir_Click()"
msg.Caption = strMsg
    Exit Sub
End If

'check for the last back-slash location
'this can be used to split the folder name
'and file name type values separately.

i = InStrRev(strSource, "\")

'get the folder name part into the variable
strSource1 = Left(strSource, i)

'take file type (*.docx, *.exl, *.txt etc.) value into a separate
'variable temporarily
If Len(strSource) > i Then
    strSource2 = Right(strSource, Len(strSource) - i)
End If

'define Listbox object
Set strList = Me.List1

'Read the first file from the folder
strfile = Dir(strSource, vbHidden)
If Len(strfile) = 0 Then
    strMsg = "No Files of the specified type: '" & strSource2 & "' in this folder."
    MsgBox strMsg, vbCritical + vbOKOnly, "cmdDir()"
    msg.Caption = strMsg
    Exit Sub
End If

j = 0
LList = ""
Do While Len(strfile) > 0
   If Left(strfile, 1) = "~" Then 'ignore backup files, if any
      GoTo readnext:
   End If
    j = j + 1 'File list count
    LList = LList & Chr(34) & strfile & Chr(34) & ","
    
readnext:
    strfile = Dir() ' read next file
Loop

LList = Left(LList, Len(LList) - 1) ' remove the extra comma at the end of the list
strList.RowSource = LList 'insert the files list into the listbox RowSource property
strList.Requery 'refresh the listbox
msg.Caption = "Total: " & j & " Files found."

Me.Target.Enabled = True

cmdDir_Click_Exit:
Exit Sub

cmdDir_Click_Err:
MsgBox Err.Description, , "cmdDir_Click()"
Resume cmdDir_Click_Exit

End Sub


Private Sub cmdSelected_Click()
'=========================================================
'Author : a.p.r.pillai
'Date   : June 2018
'Purpose: Copy Selected/All Files to Target Location
'Rights : All Rights Reserved by www.msaccesstips.com
'=========================================================

Dim lstBox As ListBox, ListCount As Integer
Dim strfile As String, j As Integer, t As Double
Dim strTarget As String, strTarget2 As String
Dim chk As String, i As Integer, yn As Integer
Dim k As Integer

On Error GoTo cmdSelected_Click_Err

msg.Caption = ""
'Read Target location address
strTarget = Trim(Nz(Me!Target, ""))

'validate Destination location
If Len(strTarget) = 0 Then
   strMsg = "Enter a Valid Path for Destination!"
   MsgBox strMsg, vbOKOnly + vbCritical, "cmdSelected()"
   msg.Caption = strMsg
   Exit Sub
ElseIf Right(strTarget, 1) <> "\" Then
      strMsg = "Correct the Path as '" & Trim(Me.Target) & "\' and Re-try"
      MsgBox strMsg, vbOKOnly + vbCritical, "cmdSelected()"
      msg.Caption = strMsg
      Exit Sub
End If

'Take a count of files in listbox
Set lstBox = Me.List1
ListCount = lstBox.ListCount - 1

'take a count of selected files, if any, for copying
i = 0
For j = 0 To ListCount
If lstBox.Selected(j) Then
  i = i + 1
End If
Next

'identify user's response for copy
If (i = 0) And (ListCount > 0) Then
       strMsg = "Copy all Files..?"
       Me.cmdSelected.Caption = "Copy All"
Else
       strMsg = "Copy Selected Files..?"
       Me.cmdSelected.Caption = "Copy Marked files"

End If

'Me.cmdSelected.Requery

'get copy option from User
yn = MsgBox(strMsg, vbOKCancel + vbQuestion, "cmdSelected_Click()")

'Run Copy selected option
If (i = 0) And (yn = vbOK) Then
    GoSub allCopy
ElseIf (i > 0) And (yn = vbOK) Then
    GoSub selectCopy
Else
    Exit Sub
End If

'disable Copy button to stop a repeat copy of the same files.
'Remarks: User can make fresh selections from the same list
'To copy them to the same target locatiion.
'Or to a different location by specifying different Path
'in the Destination Text Box
Me.List1.SetFocus
Me.cmdSelected.Enabled = False

'Display copy status
strMsg = "Total " & k & " File(s) Copied." & vbCrLf & "Check the Target Folder for accuracy."
MsgBox strMsg, vbInformation + vbOKOnly, "cmdSelected_Click()"
Me.msg.Caption = strMsg

cmdSelected_Click_Exit:
Exit Sub

allCopy:
k = 0
For j = 0 To ListCount
    strfile = lstBox.ItemData(j)
   
    strSource2 = strSource1 & strfile
    strTarget2 = strTarget & strfile
    
    FileCopy strSource2, strTarget2
  'give enough time to copy the file
  'before taking the next file
  k = k + 1
  t = Timer()
  Do While Timer() > (t + 10)
    'do nothing
  Loop
Next
Return

selectCopy:
k = 0
For j = 0 To ListCount
   If lstBox.Selected(j) Then
        strfile = lstBox.ItemData(j)
        strSource2 = strSource1 & strfile
        strTarget2 = strTarget & strfile
        
            FileCopy strSource2, strTarget2
               'give enough time to copy the file
               'before taking the next file
               k = k + 1
                t = Timer()
                Do While Timer() > (t + 10)
                    'do nothing
                Loop
   End If
Next
Return


cmdSelected_Click_Err:
MsgBox Err.Description, , "cmdSelected_Click()"
Me.msg.Caption = Err.Description
Resume cmdSelected_Click_Exit

End Sub


Private Sub List1_AfterUpdate()
On Error GoTo List1_AfterUpdate_Error
Me.cmdSelected.Enabled = True
List1_AfterUpdate_Exit:
Exit Sub

List1_AfterUpdate_Error:
MsgBox Err.Description, , "List1_AfterUpdate()"
Resume List1_AfterUpdate_Exit
End Sub

You may save the Form with the name FileCopy.

Note: FileCopy is a VBA Statement, not a built-in Function.

You can copy different sets of files from the list displayed in the list box to different target folders by first deselecting any previous selections, selecting the desired files, and updating the destination folder address in the text box.

Download the Demo Database.

You may download the sample database with the VBA Code from the Link given below:

Download FileCopy2007.zip

Download (2003) FileCopy.zip


Share:

DIR Getting File Names From Folder

Introduction.

Most of us are familiar with the Dir() function from the days of the DOS operating system. Dir() has often been the very first command introduced to anyone learning how to use a personal computer. Under Windows, this command still offers several options for retrieving information from the disk in various ways. For example, you can generate a complete list of folders, subfolders, and files on a hard disk with a single command and even redirect that list to a printer or save it to a text file using the redirection symbol (>).

In this article, however, we will focus only on how the Dir() function is used in VBA to read file names from a folder one by one and display them in the Debug window. When you run this function with a folder path as a parameter, it returns the first file name found in that folder. The question then is: how do we retrieve the remaining file names—one after another—from the same folder?

Using the DIR Command in the Debug Window.

We will try the Dir() Function from the Debug Window directly, so that it is easy to understand how to use this function to get a few file names from a folder one after the other.

  1. Open the Microsoft Access VBA Window and then display the Debug Window (Ctrl+G).
  2. Type the following command in the Debug Window and press Enter Key:
    ? Dir("")

    Dir() Function with an empty string as a parameter will fetch the first file name from the Current Folder and display it in the debug window. 

    Since we have not given a specific folder or pathname in the function parameter, it looks for files in the active folder on the disk.

  3. Now, issue the following command without any parameters to get the next file name in the current folder
    ? Dir()
    OR
    ? Dir
  4. Each time you run the DIR() command, it will get the next file from the same folder.
  5. Use a specific Folder Path as the parameter, in place of the empty string, to get files from that particular folder.
  6. Example:
    ? Dir("D:\Documents\")
    OR
    ? Dir("D:\Documents\*.*")
    

If D:\Documents\folder doesn't have files, then the above command will return an empty string. If you go further and execute the Dir command again, then it will end up with an error message.

There is an optional second parameter to the Dir() Command that we have not used in the above examples. Since this is a DOS Command executed in its own window, we can specify this second parameter to show its normal window(vbNormal) or hide the execution window (vbHidden), among other options available.

A VBA Wrapper Function for the DIR Function.

I have written a small function for you to list all the files in a folder in the Debug Window.

Public Function TestDir(ByVal strFolder As String) As String
'Function Usage e.g.: TestDir "D:\Documents\"
Dim j As Integer, strFile As String
'files counter
j = 1
'Run the function with the specified folder in a hidden window
strFile = Dir(strFolder, vbHidden)
'Next steps of Dir() function is nested in a loop
'to read all the files and print in the Debug Window

Do While Len(strFile) > 0
 Debug.Print j & ":" & strFile
 j = j + 1
 strFile = Dir()
Loop
End Function

Call the function from the Debug Window by giving the full path of the Folder as the parameter.

? TestDir("D:\Documents\")
OR
? TestDir("D:\Documents\*.*")

All the files from the specified folder will be listed in the Debug window along with a serial number. After reading and printing the last file from the folder, the Dir() function is called one more time and returns an empty string. At this point, the Do While condition evaluates to False, and the program stops.

If you need only a specific type of File to be read and displayed, then you may specify the parameter with the file type extension.

Example:

? TestDir("D:\Documents\*.xls")

The above example retrieves only Excel files and prints in the Debug window.

I have used the terms Function and Command interchangeably. Dir() is referred to as a Function in VBA reference documents and as a Command in Disk Operating System documents; both refer to the same operations done in different environments.

Share:

Form Recordset and Bookmarks

Introduction.

Bookmarks are stored in a form’s Recordset when the form is loaded into memory. For each record in the table or query linked to the form, a unique string-type identifier is generated and stored in the Bookmark property. When the form is closed, the Bookmark property values are cleared. Bookmarks are two-byte string values that cannot be displayed or printed directly—if printed to the screen, they appear as question mark symbols.

Not all Recordsets support bookmarks. This can be verified by checking the Bookmarkable property. If Bookmarkable = False, the recordset does not support bookmarks.

When you create a recordset clone in VBA from a form’s recordset (for example, Form-A), the clone and the form’s recordset will share identical bookmark values. You can use the StrComp() function to compare these bookmarks, with 0 (zero) specified as the third argument for a binary comparison.

However, if you load the same table into a different form (say, Form-B) at the same time, the bookmarks in the two forms’ recordsets will not be identical. Similarly, if you close and reopen a form that uses the same table, the bookmarks generated in each session will differ.

If a linked table does not have a primary key, then its recordset will not support bookmarks when opened in a form.

When a form has no RecordSource value, attempting to access its Bookmark property will trigger an error. But when a table or query is assigned as the form’s RecordSource, the form will maintain a Bookmark property for the current record. As you navigate through the records, you can read and store these bookmarks in variables, allowing you to return to specific records later through VBA.

Sample Bookmark-Based Trial Run.

Let us try a simple example to save the Bookmark of a record on the Form into a variable and use it later to come back to the bookmarked record.

  1. Import the Employees Table from the Northwind sample database.

  2. Create a Tabular Form for the Employees Table.

  3. In the Footer Section of the Form, create two Command Buttons.

  4. Select the first Command Button.

  5. Display its Property Sheet (F4).

  6. Change the Name Property value to cmdSave. 

  7. Change the Name Property value of the second Command Button to cmdRestore.

  8. Display the VBA Module of the Employees Form.

  9. Copy and paste the following code into the VBA Module:

    Dim bkMark As Variant
    
    Private Sub cmdRestore_Click()
       Me.Bookmark = bkMark
       MsgBox "Bookmark Restored"
    End Sub
    
    Private Sub cmdSave_Click()
        bkMark = Me.Bookmark
        MsgBox "Bookmark saved" 
    End Sub
    
    
  10. Save and Close the Form.

  11. Open the Form in normal view, showing employee records.

  12. Use the record navigation control to move to the 5th record.

  13. Click on the Save Command button to save the Bookmark of the current record in the 'bkMark' Variable.

  14. Now, move a few records forward on the Form.

  15. Click on the Restore Command Button to quickly make the 5th record current on the Form, by copying the Bookmark from the 'bkMark' Variable into the Form’s Bookmark Property.  You can try this out with different records on the Form.

The following links will show you more tricks on this topic with interesting examples:

  1. Form Bookmarks and Data Editing
  2. Form Bookmarks and Data Editing-2
  3. Form Bookmarks and Data Editing-3
  4. Forms and Custom Properties
  5. Saving Data on Forms, not in a Table
Share:

Activity Dates and Quarterly Reports

Introduction.

There are four Quarters in a Year:

Jan - Mar = 1st Quarter
Apr - Jun = 2nd
Jul - Sep  = 3rd
Oct - Dec = 4th

The first three months of the year make up the first quarter, the next three months the second quarter, and so on.

When preparing a quarterly report (covering three months as defined above) for a business entity, we usually apply a date range filter to extract the required data.

For example, to prepare the Sales Report for the second quarter of 2017, we would set the date range from April 1, 2017, to June 30, 2017 as the filtering criteria in a SELECT query. To make this step easier, instead of manually typing the date range, we might use a date-picker control on a parameter entry Form to select the dates conveniently.

If the report preparation process follows a fixed quarterly pattern, the task can be further simplified by creating a small function and using it directly in the query’s filtering criteria.

GetQrtr() Function Code.

Public Function GetQrtr(ByVal mPeriod As Date) As Integer

Dim mMonth As Integer

On Error GoTo GetQrtr_Err

mMonth = Month(Nz(mPeriod, 0))

If mMonth > 0 Then
    GetQrtr = Choose(mMonth, 1, 1, 1, 2, 2, 2, 3, 3, 3, 4, 4, 4)
else
    GetQrtr = 0
End If

GetQrtr_Exit:
Exit Function

GetQrtr_Err:
GetQrtr = 0
Resume GetQrtr_Exit
End Function

The GetQrtr() function accepts a date value as its parameter. The Month() function extracts the month number from the given date, which is then used as an argument for the Choose() function to return the correct quarter number.

For example, if the month is January, February, or March, the GetQrtr() function returns 1 to the calling procedure. If the month falls in April, May, or June, the function returns 2, representing the second quarter. Similarly, dates in July through September return 3, and dates in October through December return 4.

This function can be called from a query, another function, a form control, or a report control, simply by providing a date as the parameter.

Using the Function in Query.

Let us now see how the GetQrtr() Function can be used in a sales query to extract data for the Second Quarter 2017 Sales Report. A sample SQL statement is shown below:

SELECT SALESTABLE.* FROM SALESTABLE WHERE SALESTABLE.SALESMANCODE = "ABC" AND GetQrtr([SALESDATE]) = 2;

Here, the GetQrtr() function extracts the quarter number from each sales record’s date, based on the values defined in the Choose() function within GetQrtr(). The results are then compared against the criteria value, which filters the records for the second quarter.

Alternatively, you may set up a parameter variable within the query so that, when the query runs, it prompts for the criteria value. This allows you to directly enter the desired quarter number and filter the data dynamically for any report.

In cases where the financial year runs from April to March, the quarter numbering shifts. For example, January–March would be considered the fourth quarter of the financial year. In such a case, the filter criteria would still be 1 (for the first calendar quarter). But the report’s heading labels should indicate that it represents the fourth quarter of the financial year 2017–18.

Earlier Post Link References:


Share:

Finding Last Day of Week

Introduction.

How can we determine the weekend date or the first day of a week using the current date as input? Similarly, how can we calculate the first or last day of any week when given a specific date?

Such calculations are often required when preparing reports or queries when the week’s starting or ending date is used as a filter. For example, you may need the weekend date to group weekly sales, view filtered data, or print reports for distribution.

Wherever this is needed, you can use the following simple expression to calculate the weekend date of the current week:

The Simple Expressions

LastDayOfWeek = Date()- WeekDay(date())+7

If the current date is 14th June 2017 (or any date between 11 and 17 June 2017), then the value returned in variable LastDayOfWeek = 17th June 2017.

Example-1

To find the first-day date of the current week, use the following method:

FirstDayOfWeek = date()- WeekDay(date())+1

Assuming the current date is 14th June 2017 (or any date between 11 and 17 June 2017), the first-day date of the week returned in variable FirstDayofWeek = 11th June 2017.

Example-2

By giving a specific date as input to the expression to find the last day of the week:

dtValue = #06/27/2017#
LastDayOfWeek = dtValue - WeekDay(dtValue)+7
Result: 1st July 2017

Example-3

If you would like to do it differently, then try the following expression:

x = #06/27/2017#
'To find the last-day date of the Week:
LastDayofWeek = DateSerial(Year(Date()),1,1)+DatePart("ww",x)*7-1
Result: 1st July, 2017
'To find the first-day date of the Week.
FirstDayofWeek = DateSerial(Year(Date()),1,1)+DatePart("ww",x)*7-7
Result: 25th June, 2017

WeekLastDay Function

Define it as a Function in a VBA Module and call it wherever you want, with a date value as the parameter. The Sample Function code is given below:

Public Function WeekLastDay(ByVal dtVal As Date) As Date
'Date value as input
   WeekLastDay = dtVal - WeekDay(dtVal) + 7
End Function

WeekFirstDay Function

Public Function WeekFirstDay(ByVal dtVal As Date) As Date 
'Date value as input 
    WeekFirstDay = dtVal - WeekDay(dtVal) + 1 
End Function
Share:

PRESENTATION: ACCESS USER GROUPS (EUROPE)

Translate

PageRank

Post Feed


Search

Popular Posts

Blog Archive

Powered by Blogger.

Labels

Forms Functions How Tos MS-Access Security Reports msaccess forms Animations msaccess animation Utilities msaccess controls Access and Internet MS-Access Scurity MS-Access and Internet External Links Queries Array Class Module msaccess reports Accesstips msaccess tips WithEvents Downloads Objects Menus and Toolbars MsaccessLinks Process Controls Art Work Collection Object Property msaccess How Tos Combo Boxes ListView Control Query VBA msaccessQuery Calculation Dictionary Object Event Graph Charts ImageList Control List Boxes TreeView Control Command Buttons Controls Data Emails and Alerts Form Custom Functions Custom Wizards DOS Commands Data Type Key Object Reference ms-access functions msaccess functions msaccess graphs msaccess reporttricks Command Button Report msaccess menus msaccessprocess security advanced Access Security Add Auto-Number Field Type Form Instances ImageList Item Macros Menus Nodes Recordset Top Values Variables msaccess email progressmeter Access2007 Copy Excel Expression Fields Join Methods Microsoft Numbering System RaiseEvent Records Security Split SubForm Table Tables Time Difference Utility WScript Workgroup Wrapper Classes database function msaccess wizards tutorial Access Emails and Alerts Access Fields Access How Tos Access Mail Merge Access2003 Accounting Year Action Animation Attachment Binary Numbers Bookmarks Budgeting ChDir Color Palette Common Controls Conditional Formatting Data Filtering Database Records Defining Pages Desktop Shortcuts Diagram Disk Dynamic Lookup Error Handler Export External Filter Formatting Groups Hexadecimal Numbers Import Labels List Logo Macro Mail Merge Main Form Memo Message Box Monitoring Octal Numbers Operating System Paste Primary-Key Product Rank Reading Remove Rich Text Sequence SetFocus Summary Tab-Page Union Query User Users Water-Mark Word automatically commands hyperlinks iSeries Date iif ms-access msaccess msaccess alerts pdf files reference restore switch text toolbar updating upload vba code