Microsoft Access VBA Tutorials for self-paced learning, Class Modules, SQL Techniques, and AI Integration Guides.

Showing posts with label msaccess tips. Show all posts

Function Parameter ByVal and ByRef Usage

Introduction.

Before taking up the above subject, let us look at some fundamentals of the variables for the benefit of novices.

When we define a variable in VBA or in any other programming language, the computer reserves some memory location and allocates some memory cells (the number of cells allocated depends on the declared variable type, like Integer, Double, String, etc.) to store values passed to it. 

In layman's analogy, we can imagine a variable as a box with the name 'Apple' or whatever name we give to the box and uses that name to pick the value stored in it.  Assume that you have put 5 in the Apple box.  We can give these apples to someone in two ways.

  1. Make copies of the apples (the number) from the box ourselves and put them into another box and pass it.  The target box's name will be different.  The recipient of the new box can work with his copy of the apples, like adding more apples in his box or removing some of them, etc.  There will not be any change in the first box's contents. 
  2. We can tell the other person (or Function), which area of the room (location) you have kept the original box of apples, get the box contents from there, and work with it.  In this room (or within the function body) there may be other boxes (Variables) with different names and contents.

Making Copies of Original Values.

In the first method explained above, unlike the physical box, you can make copies of the original value and store them in different Variables.  The original value will not change in the first Variable.  The Function that gets the new Variable with the copy has no access to the first Variable.  He can do whatever he wants to do with the copy he has.

In the second case you can tell the location of the Apple_Box1 to the other Function so that it can go there and find its contents and do whatever the Function wants to do with them (add, subtract, multiply, etc., or use it as part of other calculations) or whatever operations you would like to do with them. 

To prove the first point above, let us take a closer look at the next two example functions Test_1A() (the calling function) and Test_1B() (the called function with the copy of the value).

Method-1 Examples:

Public Function Test_1A()

'Define two variables(boxes)to hold values of
'Long Integer type
Dim Apple_Box1 As Long, ApplesReceived As Long

'Put an initial value of 10

'into the variable

Apple_Box1 = 10

'sending a copy of Apple_Box1 Value to Apple_Box2

'Whatever value changes happened in Apple_Box2 in Test_1B()
'Received back into the third box:ApplesReceived

ApplesReceived = Test_1B(Apple_Box1)

'call funcction Test_1B() with the value
'Display the result in MsgBox.
MsgBox "Apple_Box1: " & Apple_Box1 & vbLf & "Apple_Box2 contents: " & ApplesReceived

End Function

In the above program, we are defining two Variables Apple_Box1 and ApplesReceived both to store Long Integer type values. Here, we are not going to bother about what is Long Integer or Short Integer and the range of values that we can store in them, etc.

Next line Apple_Box1 = 10, the value 10 is stored in Apple_Box1. 

The next three lines are remarks explaining what we are doing in the next line. 

We are calling Test_1B() Function and passing the value of Apple_Box1 to the function to do something with the value received in a Variable (ByVal Apple_Box2).  The ByVal before Apple_Box2 given in Test_1B() function states that take a copy of the value from Apple_Box1.  The ‘As Long’ appearing after the closing parenthesis indicates that the second function does some calculations with the received value and returns the result to the first function.  The new value received is stored in ApplesReceived Variable. 

Next line MsgBox() function displays the Apple_Box1 contents and the result value (after modification done to the original copy of the value) received from Test_1B() function.

The Test_1B Function.

Public Function Test_1B(ByVal Apple_Box2 As Long) As Long

'Take Note of the Key-Word 'ByVal' (says take a Copy of the Passed Value)
'Return the value back into the first function Test_1A
'After adding 15 to the original value of 10
'copied into Apple_Box2

Test_1B = Apple_Box2 + 15

End Function

There is only one executable statement in the above function.  Immediately after the function definition, four lines of remarks indicate what happens in the function.

We will take a closer look at the next line of the statement. This statement has two parts – the first part appears left of the = sign and the second part is on the right side of the equal sign. 

In this expression, the left side of the equal sign will be a Variable or a Function name.  By now you will be asking yourself why a function name is there. That will be explained in a moment.

The computer always evaluates the expression given on the right side of the equal sign first and arrives at a single value and moves that result in the Variable given on the left side of the equal sign.  Any existing value in the variable will be lost. You can write that expression in two lines to arrive at the same result as below:


Apple_Box2 = Apple_Box2 + 15

Test_1B = Apple_Box2

In the first expression, you can see that we have used the Apple_Box2 variable on the left side and right side of the = sign. As I said earlier the expression on the right side of the equal sign is evaluated first. So it takes the existing value of 10 from Apple_Box2 for calculations and Adds 15, arriving at the single result value of 25, and moves that value into Variable Apple_Box2, replacing the earlier value of 10.

If the Function name (the function name given in the first line of Code) appears on the left side of the equal sign, then the meaning of the statement is that the final result of the expression must be returned to the Calling Function.  Here, the Function Name acts as a Variable with the Data Type (As Long) specified immediately after the closing brackets on the first line.

This function name appears on the calling statement in the calling function to the right side of the = sign and a Variable Name on the left side of the = sign that saves the received result value (ApplesReceived = Test_1B(Apple_Box1).

Method-2 Examples:

In this method, we have defined only one variable Apple_Box1 as a Long Integer Type.  In the next line, the Variable is loaded with an initial value of 10.  The next two lines are remarks explaining what is happening in the next line that calls the second function Test_1D().

Compare this statement with the statement that calls Test_1B.  Unlike the statement that calls Test_1B() the Function Name Test_1D and the function parameter, Variable Apple_Box1 only appear here.  The opening and closing brackets are omitted from the function name. The parameter variable is the second item.  Test_1D() function is not returning any value back into the calling function Test_1C.  Therefore, we don't need to write this line of code in the form of an expression as we did in Test_1A Function.  But, you cannot write the statement as:

Test_1D(Apple_Box1).,

Once we use the parenthesis (normally used with the function name) around the parameter variable, then VBA assumes that some value is returned from the called function and you are forced to write it like we did it in Function Test_1A:

x = Test_1D(Apple_Box1) 'Expression
'OR use Call statement 
Call Test_1D(Apple_Box1)

There will not be any value in the variable x because no value is returned from the called function.

If you feel comfortable with this method, then you may do so. You will be defining one more variable for this purpose and your program takes up more memory.

The usage of the Call statement requires the parenthesis around the parameter variable. If no parameters to pass to the called function even then you should use the opening and closing parenthesis at the end of Function Name like Call Test_1D().

When control returns from Test_1D() the next line displays the changed value in Apple_Box1 Variable.

Public Function Test_1C()
Dim Apple_Box1 As Long

'put 10 into Variable
Apple_Box1 = 10

'here Test_1D function takes the
'location address of Apple_Box1

Test_1D Apple_Box1 'compare this statement with Test_1A function

MsgBox "Apple_Box1: " & Apple_Box1 & vbLf & "Apple_Box2 contents: " & ApplesReceived

End Function

Test_1D() function takes the location address of the parameter variable passed to it. It works directly with the value stored in the variable Apple_Box1's own location.

Public Function Test_1D(ByRef Apple_Box2 As Long)

Apple_Box2 = Apple_Box2 + 15

End Function

 Test_1D() takes the location address (this is the memory location, number of the variable) of variable Apple_Box1 into variable Apple_Box2, defined in the parameter area of Test_1D() function.

Now, look at the expression:

Apple_Box2 = Apple_Box2 + 15

Apple_Box2 contains the location address, not the contents of the Apple_Box1 variable. But, no need to make any change in the expression to do any kind of calculations.  The computer uses the location address to pick the value from there and use the value in calculations.

Even though we have used ByRef to the Parameter Variable, to accept the location address of the variable passed to it (always a number irrespective of different variable types), the rest of the parameter definition is like any other variable with variable Type (as Long) specification.  Compare Test_1D() function definition with the Test_1B().  Test_1D doesn't have the As Long at the end of the line because it is not returning any value from the function but it changes the original value at its location directly. 

You may omit the usage ByRef from the Function declaration. By default, VBA assumes that the Function Parameter declaration is ByRef (By Reference) if you have not explicitly defined the parameter as ByVal like:

Public Function Test_1D(Apple_Box2 As Long)

Each Variable Type, like Byte, Integer, Long (integer), Double, String, etc., gets allocated with enough memory cells, besides its own address, to hold their maximum range of values. This is different between Programming Languages: VBA, C, C++, C#, etc.

In Conclusion.

We don't have to bother about going too deep into all those things, but it does no harm to have a basic understanding of them.

If you get in touch with the C language and its variants, like the examples given above, you need to deal with these things, sooner or later.

Our discussion here was on a single variable and its value. How we can work with an Array of Variables and Values. We will explore its methods in the coming weeks.


Share:

DIRectory and File Copy Utility

Introduction.

Last week, we explored how to use the Dir() DOS command to read files from the disk one by one and display their names in the Debug window.

Building on that, we will now create a VBA utility that uses the Dir() command together with the very useful FileCopy statement (note that it is a statement, not a function) to read and transfer files from one folder to another location on the disk. The files can be of any type—for example, *.pdf, *.docx, *.xls, or *.* (all files).

This utility will read the files from a folder specified in a text box, list them in a list box using the Dir() command, and allow you to copy either all the listed files or only the selected ones to a target folder specified in another text box.

The Utility Form.

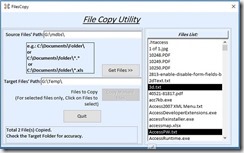
The design view image of a Form created for this purpose is given below for reference:

The form design is simple, consisting of two text boxes, one list box, three command buttons, and a label control to display messages from the utility program. You can download this utility form as part of a sample database at the end of this article.

These are the names of the Controls on the Form:

  1. Top Text box: Source

  2. Text Box 2:  Target

  3. List Box:  List1

  4. Top Command Button: cmdDir

  5. Second Command Button: cmdSelected

  6. Last Command Button: cmdClose

  7. Bottom empty Label Name: msg

Note: If you are designing this form yourself, make sure that the same control names are used as described above. The VBA code you will copy into the module references these exact names.

In addition to the main controls, there is a Label control below the first (source) text box that provides examples of how to specify the source file path correctly.

Another label control at the bottom of the form displays messages during input validation and shows error notifications while the VBA code is executing.

An Image of a sample run of the FileCopy Statement is given below:

filecopy_run0

Right-click to open Large Image in New Tab/Window.

You can create this user interface using the control names provided above. Once the form is designed with the correct control names, open the VBA window for the form and copy the following code into its VBA module:

The Form Module Code.

Option Compare Database
Option Explicit
Dim strSource1 As String
Dim strSource2 As String, strMsg As String

Private Sub cmdClose_Click()
On Error GoTo cmdClose_Click_Error

If MsgBox("Close File Copy Utility?", vbOKCancel + vbQuestion, "cmdClose_Click()") = vbOK Then
   DoCmd.Close acForm, Me.Name, acSaveYes
End If

cmdClose_Click_Exit:
Exit Sub

cmdClose_Click_Error:
MsgBox Err.Description, , "cmdClose_Click()"
Resume cmdClose_Click_Exit
End Sub

Private Sub cmdDir_Click()
'=========================================================
'Author : a.p.r.pillai
'Date   : June 2018
'Purpose: Take directory listing
'Rights : All Rights Reserved by www.msaccesstips.com
'=========================================================
Dim strSource As String, strMsg As String
Dim i As Integer, x As String
Dim j As Integer, strfile As String
Dim strList As ListBox, LList As String

On Error GoTo cmdDir_Click_Err
msg.Caption = ""

'Read Source location address
strSource = Nz(Me!Source, "")
If Len(strSource) = 0 Then
    strMsg = "Source Path is empty."
    MsgBox strMsg,vbOKOnly + vbCritical, "cmdDir_Click()"
msg.Caption = strMsg
    Exit Sub
End If

'check for the last back-slash location
'this can be used to split the folder name
'and file name type values separately.

i = InStrRev(strSource, "\")

'get the folder name part into the variable
strSource1 = Left(strSource, i)

'take file type (*.docx, *.exl, *.txt etc.) value into a separate
'variable temporarily
If Len(strSource) > i Then
    strSource2 = Right(strSource, Len(strSource) - i)
End If

'define Listbox object
Set strList = Me.List1

'Read the first file from the folder
strfile = Dir(strSource, vbHidden)
If Len(strfile) = 0 Then
    strMsg = "No Files of the specified type: '" & strSource2 & "' in this folder."
    MsgBox strMsg, vbCritical + vbOKOnly, "cmdDir()"
    msg.Caption = strMsg
    Exit Sub
End If

j = 0
LList = ""
Do While Len(strfile) > 0
   If Left(strfile, 1) = "~" Then 'ignore backup files, if any
      GoTo readnext:
   End If
    j = j + 1 'File list count
    LList = LList & Chr(34) & strfile & Chr(34) & ","
    
readnext:
    strfile = Dir() ' read next file
Loop

LList = Left(LList, Len(LList) - 1) ' remove the extra comma at the end of the list
strList.RowSource = LList 'insert the files list into the listbox RowSource property
strList.Requery 'refresh the listbox
msg.Caption = "Total: " & j & " Files found."

Me.Target.Enabled = True

cmdDir_Click_Exit:
Exit Sub

cmdDir_Click_Err:
MsgBox Err.Description, , "cmdDir_Click()"
Resume cmdDir_Click_Exit

End Sub


Private Sub cmdSelected_Click()
'=========================================================
'Author : a.p.r.pillai
'Date   : June 2018
'Purpose: Copy Selected/All Files to Target Location
'Rights : All Rights Reserved by www.msaccesstips.com
'=========================================================

Dim lstBox As ListBox, ListCount As Integer
Dim strfile As String, j As Integer, t As Double
Dim strTarget As String, strTarget2 As String
Dim chk As String, i As Integer, yn As Integer
Dim k As Integer

On Error GoTo cmdSelected_Click_Err

msg.Caption = ""
'Read Target location address
strTarget = Trim(Nz(Me!Target, ""))

'validate Destination location
If Len(strTarget) = 0 Then
   strMsg = "Enter a Valid Path for Destination!"
   MsgBox strMsg, vbOKOnly + vbCritical, "cmdSelected()"
   msg.Caption = strMsg
   Exit Sub
ElseIf Right(strTarget, 1) <> "\" Then
      strMsg = "Correct the Path as '" & Trim(Me.Target) & "\' and Re-try"
      MsgBox strMsg, vbOKOnly + vbCritical, "cmdSelected()"
      msg.Caption = strMsg
      Exit Sub
End If

'Take a count of files in listbox
Set lstBox = Me.List1
ListCount = lstBox.ListCount - 1

'take a count of selected files, if any, for copying
i = 0
For j = 0 To ListCount
If lstBox.Selected(j) Then
  i = i + 1
End If
Next

'identify user's response for copy
If (i = 0) And (ListCount > 0) Then
       strMsg = "Copy all Files..?"
       Me.cmdSelected.Caption = "Copy All"
Else
       strMsg = "Copy Selected Files..?"
       Me.cmdSelected.Caption = "Copy Marked files"

End If

'Me.cmdSelected.Requery

'get copy option from User
yn = MsgBox(strMsg, vbOKCancel + vbQuestion, "cmdSelected_Click()")

'Run Copy selected option
If (i = 0) And (yn = vbOK) Then
    GoSub allCopy
ElseIf (i > 0) And (yn = vbOK) Then
    GoSub selectCopy
Else
    Exit Sub
End If

'disable Copy button to stop a repeat copy of the same files.
'Remarks: User can make fresh selections from the same list
'To copy them to the same target locatiion.
'Or to a different location by specifying different Path
'in the Destination Text Box
Me.List1.SetFocus
Me.cmdSelected.Enabled = False

'Display copy status
strMsg = "Total " & k & " File(s) Copied." & vbCrLf & "Check the Target Folder for accuracy."
MsgBox strMsg, vbInformation + vbOKOnly, "cmdSelected_Click()"
Me.msg.Caption = strMsg

cmdSelected_Click_Exit:
Exit Sub

allCopy:
k = 0
For j = 0 To ListCount
    strfile = lstBox.ItemData(j)
   
    strSource2 = strSource1 & strfile
    strTarget2 = strTarget & strfile
    
    FileCopy strSource2, strTarget2
  'give enough time to copy the file
  'before taking the next file
  k = k + 1
  t = Timer()
  Do While Timer() > (t + 10)
    'do nothing
  Loop
Next
Return

selectCopy:
k = 0
For j = 0 To ListCount
   If lstBox.Selected(j) Then
        strfile = lstBox.ItemData(j)
        strSource2 = strSource1 & strfile
        strTarget2 = strTarget & strfile
        
            FileCopy strSource2, strTarget2
               'give enough time to copy the file
               'before taking the next file
               k = k + 1
                t = Timer()
                Do While Timer() > (t + 10)
                    'do nothing
                Loop
   End If
Next
Return


cmdSelected_Click_Err:
MsgBox Err.Description, , "cmdSelected_Click()"
Me.msg.Caption = Err.Description
Resume cmdSelected_Click_Exit

End Sub


Private Sub List1_AfterUpdate()
On Error GoTo List1_AfterUpdate_Error
Me.cmdSelected.Enabled = True
List1_AfterUpdate_Exit:
Exit Sub

List1_AfterUpdate_Error:
MsgBox Err.Description, , "List1_AfterUpdate()"
Resume List1_AfterUpdate_Exit
End Sub

You may save the Form with the name FileCopy.

Note: FileCopy is a VBA Statement, not a built-in Function.

You can copy different sets of files from the list displayed in the list box to different target folders by first deselecting any previous selections, selecting the desired files, and updating the destination folder address in the text box.

Download the Demo Database.

You may download the sample database with the VBA Code from the Link given below:

Download FileCopy2007.zip

Download (2003) FileCopy.zip


Share:

Date and Time Values

Introduction

With MS Access, the Date/Time field type can store a date, a time, or both together. When you enter a date value (for example, 14/07/2010), Access actually stores it as a whole number: 40373. This number represents the count of days since 30/12/1899, where day 1 corresponds to 31/12/1899.

You can verify this by typing the expression Format(1, "dd/mm/yyyy") in the Immediate (Debug) window. To open it, press Alt+F11 to display the VBA editor and then Ctrl+G. Pressing Enter will display the result 31/12/1899.

Similarly, time values are stored as decimal fractions of a day. For example, midnight corresponds to 0.0, while 12:00 noon corresponds to 0.5. When combined, a date and time are represented as a single numeric value. Thus, 14/07/2010 at 12:00 noon is stored as 40373.5.

When calculating time differences across midnight, Access treats midnight as 24.00 rather than 0.00 to ensure accurate results for times before midnight.

Type ? Format(40373.5,"dd/mm/yyyy hh:nn:ss") and press the Enter Key.

Result:  14/07/2010 12:00:00

It is interesting to explore how 0.5 becomes 12:00:00 noon or how the System maintains Date and Time internally.

We know we have 24 Hours in a Day, or 24 x 60 = 1440 minutes in a Day, or 24 x 60 x 60 = 86400 Seconds in a Day.

Time Calculations

That is 1 Second = 1 Day/86400 Seconds = 0.000011574074074074 Day (we can take it rounded as 0.0000115741).  The end value of 074 is infinite. Again, 1 second is = 1000 Milliseconds.

From midnight onward, the time value increases in increments of 0.0000115741, which corresponds to one second. At 23:59:59 (one second before midnight), the stored value is approximately 0.9999906659 (representing 86,399 seconds). After one more second, the day value increases by 1, so the timestamp becomes 40374.0, representing 15/07/2010 at 00:00:00.

Each second is further subdivided into milliseconds, which can be accessed using the built-in Timer function.

For example, type the following direct command in the Debug Window:

? Timer

You will get output something like the example given below, depending on the time you try this out.

Result in Seconds: 68473.81

The Value .81 part is the time in milliseconds, and 68473 is the number of seconds of the current time of the day.

If you want to see this value in the Current Time of the Day format, type the following expression in the Debug Window and press Enter Key:

? format(68473.81/86400,"hh:nn:ss")

OR

? format(68473.81*0.0000115741,"hh:nn:ss")

The Value of 68473.81 Seconds is converted into its equal value in Days by multiplying it by 0.0000115741.

Result: 19:01:14

Using the Timer Function.

You can use the Timer() Function to build a delay loop in a Program. The code below slows down the action by 5 seconds in program execution.

Public Function myFunction()
.
.
.
t = Timer
Do While Timer < t + 5 

  DoEvents

Loop
.
.
.
End Function

In the sample program shown earlier, the action is delayed by five seconds before executing the next statement after the loop.

We can retrieve the current system date and time using the built-in Now() function, while the Date() Function returns only the current system date.

When designing a table, you can set the Default Value property of a Date/Time field to either Date() or Now(). This automatically inserts the current date or the current date and time stamp, respectively, whenever a new record is added.

Now that we understand the basics of how time values are represented internally, let’s look at some examples of normal time value conversions involving hours, minutes, and seconds.

Always use date and time values together when calculating time differences. If you are designing a table and performing time-based calculations, store both the date and time in a single Date/Time field, rather than in separate fields. This is especially important when the time period spans more than one day—for example, if work begins at 20:00 and ends at 04:00 the following day.

Now, consider a case where the values are stored separately:

  • Date: 25/10/2020

  • Time: 5 hours, 7 minutes, 15 seconds

How can these be combined and converted into the correct internal storage format that represents both the date and time together?

Date and Time Converting to store in the Date/Time Field.

The Date Number 25/10/2020 is 44129 is the internal value.

To cross-check whether the number is correct or not, type the following expression in the VBA Debug window and print the result:

? format(#25/10/2020#,"0")

Result: 44129

Now, all the time values (5 Hours, 7 Minutes, and 15 Seconds) we need to convert into seconds first, then add them all together and divide the result by 86400 or (24*60*60) to get the internal time format suitable to add to the date number so that date and time value stay together in the Date/Time Field.

Now, let us do that as follows:

d_date = #25/10/2020# hrs = 5 min = 7 sec = 15 h_seconds = hrs * 60 * 60 m_seconds = min * 60 Total = h_seconds + m_seconds + sec ? Total Result: 18435 'seconds 'Convert to Time Value timVal = Total/86400 OR timval = Total/(24*60*60) ? timval Result: 0.213368055555556 'Add TimeValue to d_date d_date = d_date + timval

'Print the value of d_date in Date/time format ? format(d_date,"dd/mm/yyyy hh:nn:ss") Result: 25/10/2020 05:07:15

You may convert the Hours, Minutes, and Seconds into Time Value format in a single expression:

timval = (((hrs*3600)+(min*60)+sec)/86400)

d_date = d_date + timval

OR

d_date = d_date + (((hrs*3600)+(min*60)+sec)/86400)

Date/Time Values change to Date, Hours, Minutes, and Seconds.

How do we separate again into Date, Hours, Minutes, and Seconds, if we want them in that way again, from the Date/Time Values?

'The Date/Time Value
'we have the date+time in:
d_date = d_date + timval

'get date value separate
dt = int(d_date)

timval = d_date - dt

'get hours
hrs = int(timval*24)

'subtract hrs value from time value
timval = timval - ((hrs*3600)/86400)

'get Minutes
min = int(timval * (24*60))

'subtract Minutes from time value
timval = timval-(min*60/86400)

'get seconds
s = int(timval*86400+0.1)

The +0.1 added for the correction of the rounding Error of the actual value of

The Simple Recommended Method.

If you want to do it differently, here it is:

d = 1/86400 :'1 second value = in day value internaly H = 5 M = 7 S = 15 t = ((H*3600)+(M*60)+S)/86400

? t

0.213368055555556

TotalSeconds = t/d ? TotalSeconds 18435 hr = int(TotalSeconds/3600) ? hr 5

bal = TotalSeconds-(hr*3600) ? bal 435

mi = int(bal/60) ? mi 7

se = bal-(mi*60) ? s 15

?

? format(t,"hh:nn:ss")
05:07:15

You can follow any method you feel comfortable working with, and I recommend the last one.

Earlier Post Link References:

Share:

Input Masks and Data Entry

Input Masks and Data Entry.

Input masks are a special set of characters that can be applied to the Input Mask property of data fields in Microsoft Access to simplify data entry. They can also be used on Forms.

For example:

  • Text values can automatically convert to uppercase.

  • Slashes (/) can be inserted automatically in date formats to separate the day, month, and year.

  • Hyphens (-) can be inserted into telephone numbers to separate the country code, area code, and local number.

When entering large volumes of information manually, input masks greatly reduce effort, ensure consistency, and help maintain data in a standardized format for both entry and display.

Let us look at an example. Assume that we have a Text Field for entering Telephone Numbers, and the sample input mask Property setting is given below:

Input Mask of Telephone Number

(###) ###-#######;0;_

When the field is active before entering any values into the field, it will look like the display below:

(___) ___-____

The keystrokes you will make to type the telephone number are +914792416637, but the value will be automatically inserted in the appropriate segments, guided by the Input mask as (+91) 479-2416637. You don’t need to type the brackets, spaces, or hyphens that separate the country code, area code, and telephone number—these are inserted automatically by the input mask.

The Input Mask Property Value is expressed in three segments separated by semicolons.

The first segment value is the Input mask itself: (###) ###-#######.

The second segment value is 0 or 1. If the value is 1, the segment separator characters (brackets, spaces, and hyphens) are stored with the data in the field,  (+91) 479-2416637 (the field size must be large enough to store all the separator characters). If the value is 0, the keyed-in data alone is stored in the field as +914792416637, and the Input Mask is used for displaying the values.

The third segment value (the underscore character in the example) is used to indicate data entry positions with underscores.

When the Input mask character is # in all required character positions, it allows you to enter Digits, Spaces, plus, or Minus symbols only in the field, or leave the entire field empty.

The input mask character 9 works similarly, but it does not allow the use of plus (+) or minus (-) symbols in the data field.

The input mask character 0 restricts entry to digits 0–9 only, and, like 9, it does not permit plus or minus symbols.

Input Mask Date Field.

Input Mask Example2 (Date Field Input Mask): 99/99/0000;0;_

Sample Data Entry: _1/_1/1984 or 01/01/1984

Date value changes into 01/01/1984

In the Day and Month positions, you are allowed to enter a Space, but in the Year position, all four digits must be entered because the 0 input mask will not allow Spaces and cannot leave that area empty. But you can leave the Date Field totally empty.

Input Mask in Text Field.

Input Mask Example3 (Text Field): >CCCCCCCCCCCCCCC;0;_

Allows you to enter any Character or Space, or you can leave the data field blank. The Text Value entered will be converted to uppercase; you don't need to worry about the CAPS LOCK setting.

If you use the word Password as an Input Mask, then whatever data you enter into the field will appear as a series of * characters, and the actual value entered is not shown.

The list of Input Mask characters and their usage descriptions is given below.

Character    Description

0            Digit (0 to 9, entry required, plus [+] and minus [-] signs not allowed).

9            Digit or space (entry not required, plus and minus signs not allowed).

#            Digit or space (entry not required; spaces are displayed as blanks while in Edit mode, but blanks are removed when data is saved; plus and minus signs allowed).

L            Letter (A to Z, entry required).

?            Letter (A to Z, entry optional).

A            Letter or digit (entry required).

a            Letter or digit (entry optional).

&            Any character or a space (entry required).

C            Any character or a space (entry optional).

. , : ; - /  Decimal placeholder and thousand, date, and time separators (separator: A character that separates units of text or numbers.). (The actual character used depends on the settings in the Regional Settings Properties dialog box in Windows Control Panel).

<            Causes all characters to be converted to lowercase.

>            Causes all characters to be converted to uppercase.

!            Causes the input mask to display from right to left, rather than from left to right. Characters typed into the mask always fill it from left to right. You can include the exclamation point anywhere in the input mask.

\            Causes the character that follows to be displayed as the literal character (for example, \A is displayed as just A).

Password     Displays * in all keyed character positions.

You can use the above characters in mixed format to control or display field contents.

For example, the Input Mask>C<CCCCCCCCCCCCCC;0;_ will change the first character in uppercase and the rest of the text lowercase and accepts up to 15 characters in the field.

Technorati Tags:

Earlier Post Link References:

Share:

Repairing Compacting Database with VBA

Repairing and compacting the database.

Repairing and compacting the database is an essential maintenance task in Microsoft Access to keep the database size optimized and prevent performance issues. During regular use, MS Access creates temporary work objects within the database, causing the file size to grow over time.

If the database is used by a single user, this is not a major concern. You can simply enable the Compact on Close option in Access settings to automate this process:

  • Go to Tools → Options → General Tab

  • Check the box labeled Compact on Close

With this enabled, Access will automatically compact and repair the database each time it is closed.

However, if the database is shared on a network, enabling this feature can cause problems. Compacting requires exclusive access to the database, which means no other users can be connected while the process runs. If multiple users attempt to close the shared database, Access will attempt to compact it and fail, potentially leading to instability or corruption over time.

Granting Exclusive Access through Tools → Security → User and Group Permissions → Permissions Tab prevents multiple users from accessing the database concurrently, but that defeats the purpose of a shared system.

Access requires exclusive access during compacting because the process actually deletes the original database file and re-creates it. The compacting operation involves the following internal steps:

Database Compacting Steps.

  1. Select Tools -> Database Utilities -> Compact and Repair Database. Closes the Current Database.

  2. Creates a temporary Database named db1.mdb in the current folder.

  3. Transfers all the Objects (Tables, Forms, Reports, etc.), except the work objects, into db1.mdb.

  4. Deletes the original Database.

  5. Renames the db1.mdb file to the original name.

  6. Opens the newly created Database.

When No Database is active.

If no database is open when you select the Compact and Repair option, Microsoft Access prompts you to select the source database from your disk. It then asks you to specify the name and location for saving the compacted database. Access does not automatically overwrite the original database. Instead, it creates a new compacted copy, allowing you to decide whether to retain or replace the original file. Renaming the files is recommended for clarity and effective version control.

When compacting a database stored on a server, disk quota limitations can become a constraint. The user performing the operation must have available disk space equal to at least twice the size of the database, or more, within their allocated quota. This additional space is required because Access creates the compacted copy before the original database is removed or replaced.

In multi-user environments where multiple databases are shared across network folders, manually compacting each database can be time-consuming and inefficient. In such situations, a dedicated VBA-based Compacting Utility Program is invaluable. Such a utility can automatically compact multiple databases sequentially by following the same logical procedure described earlier (Steps 1 through 7), with minor modifications to efficiently process multiple databases.

The Compacting Utility that we create has the following advantages:

  • Uses Local Disk Space for the work file, instead of Network disk space, and runs the compacting process faster.

  • Can select more than one Database for compacting.

  • Takes a safe Backup on the Local Drive.

  • No failures due to the non-availability of enough Disk Space under the User's Disk Quota.

We will create a small Database with a Table to hold a list of Database Path Names, a Form, and two VBA Programs on the Form Module.

The Design Task.

  1. Create a new Database with the name CompUtil.mdb.

  2. Create a Table with the following structure.

    Table: FilesList
    Field Name Type Size
    ID AutoNumber  
    dbPath Text 75
  3. Save the Table with the name FilesList and key in the full path names of your Databases running on the Server, and close the table. Do not use the UNC type server addressing method: 

    "\\ ServerName\FolderName\DatabaseName" 
  4. Open a new Form and create a List Box using the FilesList Table. See the design given below. Draw two Label Controls below the List Box and two Command Buttons below that, side by side.

  5. Resize the Controls and position them to match the design given above. The finished design in Normal View is shown below. The Labels below the List Box are kept hidden and will appear only when the Program runs.

    Change the Property Values of the Form and controls, so that your Form and design look exactly like the design given above.

  6. Click on the List Box and display the property sheet (View -> Properties).

  7. Change the List Box's Property Values as given below:

    • Name: dbList
    • Row Source Type: Table/Query
    • Row Source: SELECT [FilesList].[ID], [FilesList].[dbPath] FROM [FilesList]
    • Column Count: 2
    • Column Heads: No
    • Column Widths: 0.2396";1.4271"
    • Bound Column: 2
    • Enabled: Yes
    • Locked: No
    • Multiselect: Simple
    • Tab Index: 0
    • Left: 0.3021"
    • Top: 0.7083"
    • Width: 3.2083"
    • Height: 1.7708"
    • Back Color: 16777215
    • Special Effect: Sunken
  8. Resize the child Label Control, attached to the List Box, to the same size and position it above the List Box. Change the Caption to Database List.

  9. Click on the first Label Control below the List Box, display the Property Sheet, and change the following Properties:

    • Name: lblMsg
    • Visible: No
    • Left: 0.3021"
    • Top: 2.5"
    • Width: 3.2083"
    • Height: 0.5"
    • Back Color: 128
    • Special Effect: Sunken
  10. Display the Property Sheet of the second Label Control and change the following Properties:

    • Name: lblstat
    • Visible: No
    • Left: 0.3021"
    • Top: 3.0417"
    • Width: 3.2083"
    • Height: 0.1667"
    • Back Style: Transparent
    • Back Color: 16777215
    • Special Effect: Flat
    • Border Style: Transparent
  11. Change the following properties of the left-side Command Button:

    • Name: cmdRepair
    • Caption: Repair/Compact
    • Tab Index: 1
    • Left: 0.3021"
    • Top: 3.25"
    • Width: 1.4271"
    • Height: 0.2292"

  12. Change the following properties of the right-side Command Button:

    • Name: cmdClose
    • Caption: Quit
    • Tab Index: 1
    • Left: 2.0833"
    • Top: 3.25"
    • Width: 1.4271"
    • Height: 0.2292"
  13. Change the Properties of the Form. Click on the left top corner of the Form where the left-side and Top design guides (Scales) meet. When you click there, a blue square will appear, indicating that the Form is selected. Display the Property Sheet and click on the All Tab. If that is not the current one, change the following Properties:

    • Caption: External Repair/Compact Utility
    • Default View: Single Form
    • Views Allowed: Form
    • Allow Edits: Yes
    • Allow Deletions: No
    • Allow Additions: No
    • Data Entry: No
    • Scroll Bars: Neither
    • Record Selectors: No
    • Navigation Buttons: No
    • Dividing Lines: No
    • Auto Resize: Yes
    • Auto Center: Yes
    • Pop up: Yes
    • Modal: Yes
    • Border Style: Dialog
    • Control Box: Yes
    • Min, Max Buttons: None
    • Close Button: Yes
    • Width: 3.9063"
  14. Click on the Detail Section of the Form, and change the Height Property:

    • Height: 3.7917"
  15. Create a Header Label at the top with the Caption Compacting Utility, and set the Font Size to 18 Points.

    NB: If you would like to create a Heading with 3D-style characters, as the sample shown above, visit the Page Create 3D Heading on Forms and follow the procedure explained there. You can do it later.

  16. Select the Rectangle Tool from the Toolbox and draw a Rectangle around the Controls as shown on the Design.

    Form Class Module Code.

  17. Display the VBA Module of the Form (View -\> Code), Copy, and paste the following code into it, and save the Form with the name Compacting.
    Private Sub cmdClose_Click()
    If MsgBox("Shut Down...?", vbYesNo + vbDefaultButton2 + vbQuestion, _"cmdQuit_Click()") = vbYes Then
        DoCmd.Quit
    End If
    End Sub
    
    Private Sub cmdRepair_Click()
    Dim lst As ListBox, lstcount As Integer
    Dim j As Integer, xselcount As Integer
    Dim dbname As String, t As Double, fs, f
    Dim ldbName As String, strtmp As String
    
    'create a temporary folder C:\tmp, if not present
    On Error Resume Next
    Set fs = CreateObject("Scripting.FileSystemObject")
    Set f = fs.GetFolder("c:\tmp")
        If Err = 76 Or Err > 0 Then
           Err.Clear
           fs.createfolder ("c:\tmp")
        End If
    
    On Error GoTo cmdRepair_Click_Err
    
    Me.Refresh
    Set lst = Me.dbList
    lstcount = lst.ListCount - 1
    
    xselcount = 0
    For j = 0 To lstcount
    If lst.Selected(j) Then
        xselcount = xselcount + 1
    End If
    Next
    
    If xselcount = 0 Then
       MsgBox "No Database(s)Selected."
       Exit Sub
    End If
    
    If MsgBox("Ensure that Selected Databases are not in Use. " _
    & vbCrLf & "Proceed...?", vbYesNo + vbDefaultButton2 + vbQuestion, "cmdRepair_Click()") = vbNo Then
       Exit Sub
    End If
    
    For j = 0 To lstcount
        If lst.Selected(j) Then
          dbname = lst.Column(1, j)
           dbname = Trim(dbname)
           ldbName = Left(dbname, Len(dbname) - 3)
           ldbName = ldbName & "ldb" 'for checking the presense of lock file.
           If Len(Dir(ldbName)) > 0 Then 'database is active
              MsgBox "Database: " & dbname v vbCrLf & "is active. Skipping to the Next in list."
              GoTo nextstep
           End If
    
           If MsgBox("Repair/Compact: " & dbname & vbCrLf & "Proceed...?", vbQuestion + vbDefaultButton2 + vbYesNo, "cmdRepair_Click()") = vbYes Then
                Me.lblMsg.Visible = True
                Me.lblStat.Caption = "Working, Please wait..."
                Me.lblStat.Visible = True
                DoEvents
    
                dbCompact dbname 'run compacting
    
                Me.lblStat.Caption = ""
                DoEvents
    
    nextstep:
                t = Timer
                Do While Timer <= t + 7 'delay loop
                   DoEvents 'do nothing
                Loop
            End If
        End If
    Next
    
       Me.lblMsg.Visible = False
       Me.lblStat.Caption = ""
       Me.lblStat.Visible = False
    
    strtmp = "c:\tmp\db1.mdb" 'Delete the temporary file
    If Len(Dir(strtmp)) > 0 Then
      Kill strtmp
    End If
    
    Set fs = Nothing
    Set f = Nothing
    Set lst = Nothing
    
    cmdRepair_Click_Exit:
    Exit Sub
    
    cmdRepair_Click_Err:
    MsgBox Err.Description, , "cmdRepair_Click()"
    Resume cmdRepair_Click_Exit
    End Sub
    

    Private Function dbCompact(ByVal strdb As String)
    Dim t As Long
    Dim xdir As String, strbk As String
    Const tmp As String = "c:\tmp\"
    
    On Error GoTo dbCompact_Err
    
    If Len(Dir(tmp & "db1.mdb")) > 0 Then
        Kill tmp & "db1.mdb"
    End If
    
    t = InStrRev(strdb, "\")
    If t > 0 Then
       strbk = Mid(strdb, t + 1)
    End If
    strbk = tmp & strbk
    
    xdir = Dir(strbk)
    If Len(xdir) > 0 Then
       Kill strbk
    End If
    'Make a Copy in c:\tmp folder as safe backup
    Me.lblMsg.Caption = "Taking Backup of " & strdb & vbCrLf _
    & "to " & tmp
    DoEvents
    
       DBEngine.CompactDatabase strdb, strbk
    
    Me.lblMsg.Caption = "Transferring Objects from " & strdb & vbCrLf _
    & "to " & tmp & "db1"
    DoEvents
    
       DBEngine.CompactDatabase strdb, tmp & "db1.mdb"
    
    ' Delete uncompacted Database and Copy Compacted db1.mdb with
    ' the Original Name
    
    lblMsg.Caption = "Creating " & strdb & " from " & tmp & "db1.mdb"
    DoEvents
    
        If Len(Dir(strdb)) > 0 Then
            Kill strdb
        End If
    
        DBEngine.CompactDatabase tmp & "db1.mdb", strdb
    
    lblMsg.Caption = strdb & " Compacted Successfully." & vbCrLf & "Database backup copy saved at Location: " & tmp
    DoEvents
    
    dbCompact_Err_Exit:
    Exit Function
    
    dbCompact_Err:
    MsgBox Err & " : " & Err.Description, , "dbCompact()"
      Resume dbCompact_Err_Exit
    End Function
    

    You can set the Compacting Form to open at Startup. Select Startup from the Tools Menu. Select Form Compacting in the Display Form/Page Control. To hide the Database Window, remove the check mark from the Display Database Window Option.

    The Trial Run

  18. Open the Compacting Form in Normal view. Select one or more Databases from the List Box for Compacting.

  19. Click the Repair/Compact Command Button.

When you run the program for the first time, it checks for the folder C:\tmp. If that folder is not found, the program automatically creates it. This directory serves as the working area for the Compacting Utility—regardless of whether the program is executed from the server or a local drive. All backup copies of the compacted databases are stored in this location for safekeeping.

Before initiating the compacting process, the program performs a status check on each selected database to ensure that no users are currently accessing it. If a database is found to be in use, the program will display a notification message. The compacting operation is skipped for that particular database, preventing potential file conflicts or data corruption.

The Label Controls that we have created and kept hidden under the List Box will be made visible. It will be updated with the program's current activity information at different stages of the Compacting Procedure.

Any suggestions for improvement of this Program are welcome.

The Demo Database is upgraded to MS-Access Version 2016 and can be downloaded from the link below.

Share:

Database Daily Backup

Database Daily Backup Procedure.

If your database is installed on a Local Area Network (LAN), regular backups are typically performed on a daily, weekly, monthly, quarterly, and yearly basis. The Network Administration Team manages these backup media and stores them securely in fireproof cabinets located away from the computer center.

In the event of database corruption or loss, you can request that it be restored from backup. Send a request to the Network Administrator providing details such as your database file path and the desired backup date. However, the recovery process may take several hours or even a few days, as the backup tapes or other storage media must be retrieved from their remote storage location before restoration can begin.

If your project maintains its own independent backup routine and performs backups regularly, you can avoid relying on the centralized network backup system. This not only reduces delays in database recovery but also ensures that your application's downtime remains minimal.

You can secure the Database Objects (Forms, Queries, Tables, Reports, etc.) from within the Database, but when it comes to the physical safety of the Database File, this will not work. When the database resides on a network location, multiple users — beyond your designated application users — may have access rights to that shared folder. This can pose a security risk, as the database is not fully protected in such an environment.

You cannot make a Database Read-Only under Network Security to protect it from inadvertent loss. If you do that, then you cannot work with the Database.

Automatic Daily Backup

As a precautionary measure, we can take a quick Daily Backup of the Database File from the Server to the Local Disk, or vice versa, with a DOS Batch File. The Backup should run immediately when the Database is open for the first time of the day.

We can do this with a simple VBA Routine to create a DOS Batch File in the database folder and run it from there to make a copy to the local drive. We need a small table with a single record to keep track of the Backup event. The backup program should run only once a day when the database is open by any user for the first time of the day, and should prevent the program from running on subsequent shutdowns and reopening events.

Preparations

  1. Create a Table with the following structure and save it with the name Bkup_Ctrl, and add a single record with a date earlier than today in the bkupdate Field. Leave the other field blank.

    Table: Bkup_Ctrl Structure
    Srl. Field Name Type Size
    1. bkupdate Date/Time  
    2. workstation Text 20

    Table : Bkup_Ctrl
    bkupdate workstation
    01/05/2008 PC1-1234
  2. Copy and Paste the following Code into a Global Module of your Project and save the Module.

    Public Function SysBackup()
    '------------------------------------------------------'
    'Author: a.p.r. pillai
    'Date  : 01-Apr-2008
    'URL   : http://www.msaccesstips.com
    'All Rights Resersed by msaccesstips.com
    '------------------------------------------------------
    Dim dbPathName, j As Long, t As Date
    Dim bkupdate, strBatchFlle As String, qot As String
    
    On Error GoTo sysBackup_Err
    
    qot = Chr$(34)
    bkupdate = Nz(DLookup("bkupdate", "Bkup_ctrl"), 0)
    ' bkupdate+7 > date() for weekly backup
    If bkupdate = Date Or bkupdate = 0 Then
        Exit Function
    End If
    
    dbPathName = CurrentDb.Name
    'dbPathName = "\\ServerName\Accounts\MIS\MISDB.Accdb" 'If BE on LAN Server
    
    j = InStrRev(dbPathName, "\ ")
    
    If j > 0 Then
        strBatchFlle = Left(dbPathName, j)
        strBatchFile = strBatchFlle & "bakup.bat"
        Open strBatchFile For Output As #1
            Print #1, "@Echo off"
            Print #1, "Echo :------------------------- "
            Print #1, "Echo : " & dbPathName
            Print #1, "Echo Daily Backup to C:\ "
            Print #1, "Echo :------------------------- "
            Print #1, "Echo : "
            Print #1, "Echo :Please wait... "
            Print #1, "Echo : "
            Print #1, "Copy " & qot & dbPathName & qot & " " & qot & "C:\ " & qot
    'add lines here for Back-end database or for other Files
        Close #1
    
    'Copy file
        Call Shell(strBatchFile, vbNormalFocus)
        t = Timer
        Do While Timer <= t + 10 'increase for bigger database 
           DoEvents 'wait for 10 seconds to complete the process
        Loop
    
        DoCmd.SetWarnings False
        DoCmd.RunSQL "UPDATE Bkup_Ctrl SET Bkup_Ctrl.bkupdate = Date(), Bkup_Ctrl.workstation = Environ('COMPUTERNAME');"        DoCmd.SetWarnings True
    
        'Kill strBatchFile
      End If
    
    sysBackup_Exit:
    Exit Function
    
    sysBackup_Err:
    MsgBox Err.Description, , "sysBackup()"
    Resume sysBackup_Exit
    End Function
    
  3. Add the following line of code in the On_Load() Event Procedure of the Startup Screen or Main Switchboard, or any other form that opens immediately after loading the Database.

SysBackup

How does it work?

At the beginning of the SysBackup() routine, the Program reads the last backup date from the Bkup_Ctrl Table and checks whether it matches today's date. If it does, then it stops the program from proceeding further. By replacing the expression bkupdate = date() with the expression bkupdate+7 > date(), you can schedule the Backup to run at weekly intervals on a particular Day of the Week.

The VBA Routine creates a DOS Batch File in the same folder as your Database and runs it. The DOS Copy command is used for copying the Database File to the User's local drive. Even though a VBA FileCopy() Function is available, this may not work successfully from within the Database to make a copy of the same Database.

You may modify the line to change the Target Location C:\ to a different one if needed.

A delay loop is built into the routine to slow down the program for about 10 seconds, to give enough time for the DOS Command to complete copying the Database. Normally, the VBA Code execution will not wait for the DOS Command to complete before executing the next statement. This will also prevent the User from starting to work with the Database before the copy operation is complete. You may increase or decrease this value based on the size of the Database, or after trial runs of the procedure to determine the approximate time it takes to copy.

The control table's bkupdate Field is updated with the current date immediately after completion of the Copy operation. This will ensure that the Program will not run in subsequent Database Sessions on the same day. If your Application has a Back-End Database, then install this table in there and link it to the Front-End. 

If your application is installed on a network and shared by multiple users, you can determine which workstation holds the latest backup copy by referencing the workstation field.

The Kill strBatchFile statement (if enabled) will delete the DOS Batch File after the backup operation. The delay loop protects the DOS Batch File from this statement for about 10 seconds. Enable this line if you don't want the batch file to remain in the database folder.

Create a Batch File Manually.

You can create a DOS Batch file manually with a Text Editor like Windows Notepad, install it in the Database folder, and run it from the Code or Macro. You may define the Source and Target Locations manually for the Copy command.

Portability Considerations

The advantage of the above Code is portability and convenience. You can copy the Code and the backup_ctrl Table into your other Projects and run it without much change or worrying about the Source or Target Location addresses of the Database.

Download

Download Demo Daily Backup


Share:

Days in Month Function

Function to Calculate Number of Days

The User-Defined Function DaysM() given below can be used in calculations that involve the number of days of a particular month. Copy and paste the following Code into a Global Module and save it in your Project.

Function VBA Code

Public Function DaysM(ByVal varDate) As Integer 
Dim intYear As Integer
Dim intmonth As Integer

On Error GoTo DaysM_Err

If Nz(varDate) = 0 Then
    DaysM = 0    
    Exit Function
End If

intYear = Year(varDate)
intmonth = Month(varDate)

DaysM = Day(DateSerial(intYear, intmonth + 1, 1) - 1)

DaysM_Exit:
Exit Function
DaysM_Err:
MsgBox Err.Description, , "DaysM()"
DaysM = 0
Resume DaysM_Exit
End Function

Syntax: X = DaysM(varDate)

Replace the varDate parameter with a valid Date. The Number of Days for the Month will be returned in Variable X.

The Parameter value can be a valid Date, a Date in Text format like "15-02-2008", or its corresponding numeric value 39493.

If you would like to rewrite the Function differently by adding a few extra lines of code, then you may replace the expression DaysM = Day(DateSerial(intYear, intmonth + 1, 1) - 1) with the following lines of code:

DaysM = Choose(intmonth, 31, 28 + IIf((intYear Mod 4) = 0, 1, 0), 31, 30, 31, 30, 31, 31, 30, 31, 30, 31)

If intmonth=2 then
   Select Case (intYear Mod 400)
       Case 100, 200, 300
            DaysM = DaysM - 1
   End Select
End if

Usage Options

This Function can be used in VBA Routines, Queries, or Text Controls in Forms or Reports where the number of days of a particular month is involved in calculations.

Example: An Employee resumed duty after her vacation on 15-02-2008. To calculate the balance number of days for her salary payment, one of the three Expressions given below can be used.

Dt = #02/15/2008#

BalDays = 1 + DateDiff("d", Dt, DateSerial(Year(Dt), Month(Dt) + 1, 1) - 1) 

or

BalDays =   1 + Day(DateSerial(Year(Dt), Month(Dt) + 1, 1) - 1) - Day(Dt) 

or

BalDays = 1 + DaysM(Dt) - Day(Dt)

The first two calculations are performed using built-in functions. The `DaysM()` function, which uses the second expression for its primary calculation, produces the same result with fewer characters in the final expression.

Determining the number of days in a month is generally straightforward. We commonly use simple rules to remember that April, June, September, and November (months 4, 6, 9, and 11) have 30 days, while February has 28 days. February alone requires additional calculations to determine whether an extra day should be added in a leap year. A commonly used rule is that a year evenly divisible by 4 is treated as a leap year.

However, this rule requires refinement when dealing with century years. For example, February had 29 days in the year 2000 because it was a leap year. In contrast, the years 1700, 1800, and 1900 were not leap years, despite being evenly divisible by 4. Similarly, the years 2100, 2200, and 2300 will also be treated as common years.

The leap year rule is based on the Earth's orbital period around the Sun. A calendar year is commonly approximated as 365.25 days, with every fourth year designated as a leap year containing 366 days by adding one extra day to February.

However, the Earth's actual orbital period is approximately 365 days, 5 hours, 48 minutes, and 45.5 seconds (365.2422 days). Using an average of 365.25 days takes an excess of approximately 0.0078 days each year. Over a period of about 400 years, this accumulates to approximately 3.12 extra days. To compensate for this excess, century years that are not evenly divisible by 400 are treated as common years, even though they are evenly divisible by 4.

The remaining excess of approximately 0.12 days accumulates to about 1.2 days over 4,000 years. Consequently, under this extended rule, the year 4000 is treated as a common year, even though it is evenly divisible by 400.

Who knows, before then, another scientific discovery may require us to revise the entire system once again.

References: Microsoft Encarta Encyclopedia

History of Calendar.

The Roman Calendar

The original Roman calendar, introduced around the 7th century BC, consisted of 10 months and a Total of 304 days, with the year beginning in March. Later in the same century, two additional months—January and February—were added. However, because the months contained only 29 or 30 days, an extra month had to be inserted approximately every second year to keep the calendar aligned with the seasons.

Days within each month were identified using the Roman system of counting backward from three fixed dates: the Calends, the first day of the month; the Nones, the ninth day before the Ides; and the Ides, which fell on the 13th day in some months and the 15th day in others. Over time, the Roman calendar became increasingly disordered because the officials responsible for adding days and months often manipulated the calendar to extend their terms of office or to hasten or delay elections.

In 45 BC, Julius Caesar, advised by the Greek astronomer Sosigenes (flourished in the 1st century BC), introduced a purely solar calendar. This system, known as the Julian calendar, established the common year as 365 days and designated every fourth year as a leap year with 366 days. The term leap year originates from the effect of the extra day in February, which causes dates after February to occur two weekdays later than in the previous year, rather than one weekday later as in a common year. The Julian calendar also established the order of the months and the seven-day week that form the basis of the modern calendar.

In 44 BC, Julius Caesar renamed the month Quintilis to Julius (July) in his own honor. Later, the month Sextilis was renamed Augustus (August) to honor Caesar Augustus, Julius Caesar's successor. Some authorities maintain that Augustus also established the lengths of the months as they are used today.

The Gregorian Calendar.

The Julian year was 11 minutes and 14 seconds longer than the solar year. This discrepancy accumulated until by 1582 the vernal equinox (see Ecliptic) occurred 10 days earlier, and Church holidays did not occur in the appropriate seasons. To make the vernal equinox occur on or about March 21, as it had in AD 325, the year of the First Council of Nicaea, Pope Gregory XIII issued a decree dropping 10 days from the calendar. To prevent further displacement, he instituted a calendar, known as the Gregorian calendar, which provided that century years divisible evenly by 400 should be leap years and that all other century years should be common years. Thus, 1600 was a leap year, but 1700 and 1800 were common years.

The Gregorian calendar, or the New Style calendar, was slowly adopted throughout Europe. It is used today throughout most of the Western world and in parts of Asia. When the Gregorian calendar was adopted in Great Britain in 1752, a correction of 11 days was necessary; the day after September 2, 1752, became September 14. Britain also adopted January 1 as the day when a new year begins. The Soviet Union adopted the Gregorian calendar in 1918, and Greece adopted it in 1923 for civil purposes, but many countries affiliated with the Greek Church retain the Julian, or Old Style, calendar for the celebration of Church feasts.

The Gregorian calendar is also called the Christian calendar because it uses the birth of Jesus Christ as a starting date. Dates of the Christian era (see Chronology) are often designated AD (Latin anno domini, "in the year of our Lord") and BC (before Christ). Although the birth of Christ was originally given as December 25, 1 BC, modern scholars now place it as about 4 BC.

Because the Gregorian calendar still entails months of unequal length, so that the dates and days of the week vary through time, numerous proposals have been made for a more practical, reformed calendar. Such proposals include a fixed calendar of 13 equal months and a universal calendar of four identical quarterly periods.

Source: Microsoft Encarta Encyclopedia

Earlier Post Link References:

Share:

Who changed the Data

Data Security.

"Who changed the data?" — This question often arises when incorrect or inconsistent information is discovered in a database, especially when it leads to serious consequences affecting multiple areas of operation.

At first glance, the issue may not be obvious, and you might wonder what this is all about. To bring the story into focus, let’s consider a scenario that illustrates how such a situation can unfold.

Let’s assume there is a database that maintains records of the company’s credit customers, including high-profile clients such as Ministry officials or even Ministers themselves. These credit accounts are categorized based on status, credibility, or other internal criteria and are assigned specific Category Codes for easier classification.

Periodically, statements showing outstanding payments are generated and sent to these credit parties as part of a routine follow-up process. The purpose is to remind them to make timely payments or to verify the accuracy of the statement.

Since high-profile accounts are assigned special Category Codes, their statements are printed separately for internal records only, and never forwarded to the respective parties, as per strict directives from senior management.

Multiple individuals in the Accounts Department are authorized to update the database. One day, however, an employee accidentally altered the Category Code of a VIP account, inadvertently reclassifying it under the common category. As a result, the monthly statement was printed and dispatched to the VVIP party along with the regular batch.

For accounts under the common category, this is standard practice—statements are routinely sent to encourage timely payments. But when such a statement is delivered to a VVIP client, it can create serious complications. This misstep not only breached protocol but also exposed the company to potential embarrassment and reputational risk at the highest levels.

The investigating committee began pointing fingers at everyone who had access to the data, but no one stepped forward or admitted to the error. Tension mounted as the blame game escalated—until the EDP (Electronic Data Processing) Department was brought in. Now, all eyes turned to the poor application developer, who suddenly found himself in the hot seat. After all, he had full access to the system and the ability to modify any data. It was easy to assume he could be the one responsible.

Fortunately, he was prepared for such a situation. Anticipating that one day such a scenario might arise, he had already built mechanisms into the system to trace changes. Within minutes, he uncovered the truth—the real culprit had left behind a digital fingerprint in the record, unmistakable and undeniable. Whether the change had been made deliberately or by accident was a separate matter, but the evidence was clear.

If you're from the Accounts Department, you may have many questions and might even argue that such a mistake could never happen in your team. Fair enough—but remember, this is just a hypothetical story. Still, the possibility, however unlikely, cannot be ruled out entirely.

User/Date/Time Stamps.

Data Entry and Editing are two critical operations in maintaining an up-to-date and reliable database. To ensure data accuracy, field-level validation checks are implemented to prevent the entry of incorrect or inconsistent information. In modern systems, these functions are increasingly supported by advanced tools such as scanners, handheld terminals (HHTs), and other input devices. These technologies not only streamline data capture but also enhance traceability by automatically recording details such as User IDs, timestamps, and other metadata along with the entered data.

When multiple users are accessing and updating data in Microsoft Access databases, it is essential to deploy the application in a secure network environment. This includes implementing Microsoft Access Workgroup Security, which allows the creation of user groups with specific roles and access levels. Each user should log in with a unique User ID and password, ensuring that their activity is restricted to the permissions assigned to their role.

In the context of maintaining data integrity, a method for tracking changes made to records. When a new record is added, or an existing one is edited, the User ID, along with the date and time of the action, can be recorded within the record itself. This metadata serves multiple purposes: it helps in sorting records chronologically, tracking changes over time, and, most importantly, identifying who made a specific change and when.

Inadvertent edits are not uncommon, and the user responsible might not immediately recall the affected record. However, with time and date information captured, users can review recently modified records to locate and correct any errors, provided they have the necessary permissions to do so.

Add extra Time Stamp Fields to the Table.

While designing the Table, add the following three fields at the end of the field list to record the Data Entry Date-Time, User ID, and the record Edited Date-Time:

Field Name Data Type Size
DEDate Date/Time  
EditedBy Text 20
EditDate Date/Time  

Setting Up Auto-Tracking for Data Entry and Edits

To automatically track when a record is added or modified, follow these steps:

  1. Open the Table in Design View.

  2. Click on the DEDate field (or the equivalent field meant to store the data entry timestamp).

  3. In the Default Value property (bottom pane), enter the following expression:

    mathematica
    =Now()

    This ensures that the current date and time are recorded automatically when a new record is added.

The EditDate and EditedBy Fields will be used to track the timestamp and user information every time a record is edited. These values will be updated through a VBA event procedure.


Form Design Tips for Tracking Fields

When designing your Data Entry/Edit Forms, place the fields DEDate, EditDate, and EditedBy on the Form as well. Then:

  • Set the Locked property of each of these fields to Yes, so that users cannot change the values manually.

  • Set the Tab Stop property to No, preventing the cursor from navigating into these fields during normal data entry or editing.

Optional Display Settings:

  • If you'd like users to see but not interact with the field (e.g., to sort or review their own edits), set:

    • Enabled = No

    • Locked = No

  • If you prefer to hide these fields from users altogether:

    • Set the Visible property to No

These settings provide flexibility depending on whether users need visibility into their own change history.

Automating the Audit Trail with VBA

To record and edit information automatically, we’ll use the BeforeUpdate event of the form. This code captures the edit timestamp and the user ID each time a record is modified:

Steps:

  1. While the Form is still in Design View, go to:

    • View > Code (to open the Form’s VBA module).

  2. Copy and paste the following VBA code into the module:

    vba
    Private Sub Form_BeforeUpdate(Cancel As Integer) If Me.NewRecord = False Then Me![EditDate] = Now() Me![EditedBy] = CurrentUser() End If End Sub
  3. Save the Form.


With this setup, any new or modified record will automatically capture the relevant audit information. This method is especially useful in multi-user environments where tracking accountability is essential.

To Avoid Further Pitfalls.

Limitations of the Simple Audit Trail

The BeforeUpdate() Event helps track who edited what and when. It's important to understand that this approach is not foolproof.

For instance, suppose a user unintentionally makes a critical error in a record. If someone else later edits a different field in that same record—perhaps as part of routine work—the original edit details will be overwritten by the second user's information. As a result, the actual source of the mistake is lost, and blame might fall on an innocent person.

This could lead to confusion—or worse, disciplinary action against the wrong individual.


Enhancing the Audit Trail: Suggested Approaches

To improve reliability and accountability, consider these two advanced solutions:

1. Multi-Level Edit Tracking

Add additional fields to the table to track multiple editing events—for example:

  • EditDate1, EditedBy1

  • EditDate2, EditedBy2

  • … up to EditDate5, EditedBy5

Each new edit shifts the previous entries down by one level. When the maximum number of tracked edits is reached (say, 5), the oldest one is overwritten.

This approach allows administrators to trace back a limited history of changes and is helpful for short-term auditing.

2. Full Edit History Table

A more comprehensive and professional solution is to maintain a separate change history table. Every time a record is edited, the original version of the record is copied to this history table, along with:

  • Primary Key ID

  • Date and Time of Edit

  • User ID

  • Changed Field Names

  • Original and New Values (optional but ideal)

This method enables a complete reconstruction of a record’s change history, offering transparency and accountability, particularly in sensitive environments like finance, legal, or healthcare systems.

Implementation Notes

  • The history table can be populated using the Form_BeforeUpdate or Form_AfterUpdate events, depending on whether you want to capture data before or after the change.

  • Use VBA code to compare the current values with the existing values in the record to detect changes.

  • The history table can be indexed on PrimaryKey, EditDate, or EditedBy for quick lookup.

  • Consider implementing user permissions that prevent unauthorized access to this history log.

Earlier Post Link References:

Share:

PRESENTATION: ACCESS USER GROUPS (EUROPE)

Translate

PageRank

Post Feed


Search

Popular Posts

Blog Archive

Powered by Blogger.

Labels

Forms Functions How Tos MS-Access Security Reports msaccess forms Animations msaccess animation Utilities msaccess controls Access and Internet MS-Access Scurity MS-Access and Internet External Links Queries Array Class Module msaccess reports Accesstips msaccess tips WithEvents Downloads Objects Menus and Toolbars MsaccessLinks Process Controls Art Work Collection Object Property msaccess How Tos Combo Boxes ListView Control Query VBA msaccessQuery Calculation Dictionary Object Event Graph Charts ImageList Control List Boxes TreeView Control Command Buttons Controls Data Emails and Alerts Form Custom Functions Custom Wizards DOS Commands Data Type Key Object Reference ms-access functions msaccess functions msaccess graphs msaccess reporttricks Command Button Report msaccess menus msaccessprocess security advanced Access Security Add Auto-Number Field Type Form Instances ImageList Item Macros Menus Nodes Recordset Top Values Variables msaccess email progressmeter Access2007 Copy Excel Expression Fields Join Methods Microsoft Numbering System RaiseEvent Records Security Split SubForm Table Tables Time Difference Utility WScript Workgroup Wrapper Classes database function msaccess wizards tutorial Access Emails and Alerts Access Fields Access How Tos Access Mail Merge Access2003 Accounting Year Action Animation Attachment Binary Numbers Bookmarks Budgeting ChDir Color Palette Common Controls Conditional Formatting Data Filtering Database Records Defining Pages Desktop Shortcuts Diagram Disk Dynamic Lookup Error Handler Export External Filter Formatting Groups Hexadecimal Numbers Import Labels List Logo Macro Mail Merge Main Form Memo Message Box Monitoring Octal Numbers Operating System Paste Primary-Key Product Rank Reading Remove Rich Text Sequence SetFocus Summary Tab-Page Union Query User Users Water-Mark Word automatically commands hyperlinks iSeries Date iif ms-access msaccess msaccess alerts pdf files reference restore switch text toolbar updating upload vba code